UR-Advisor
Online advisor and questionnaire tool
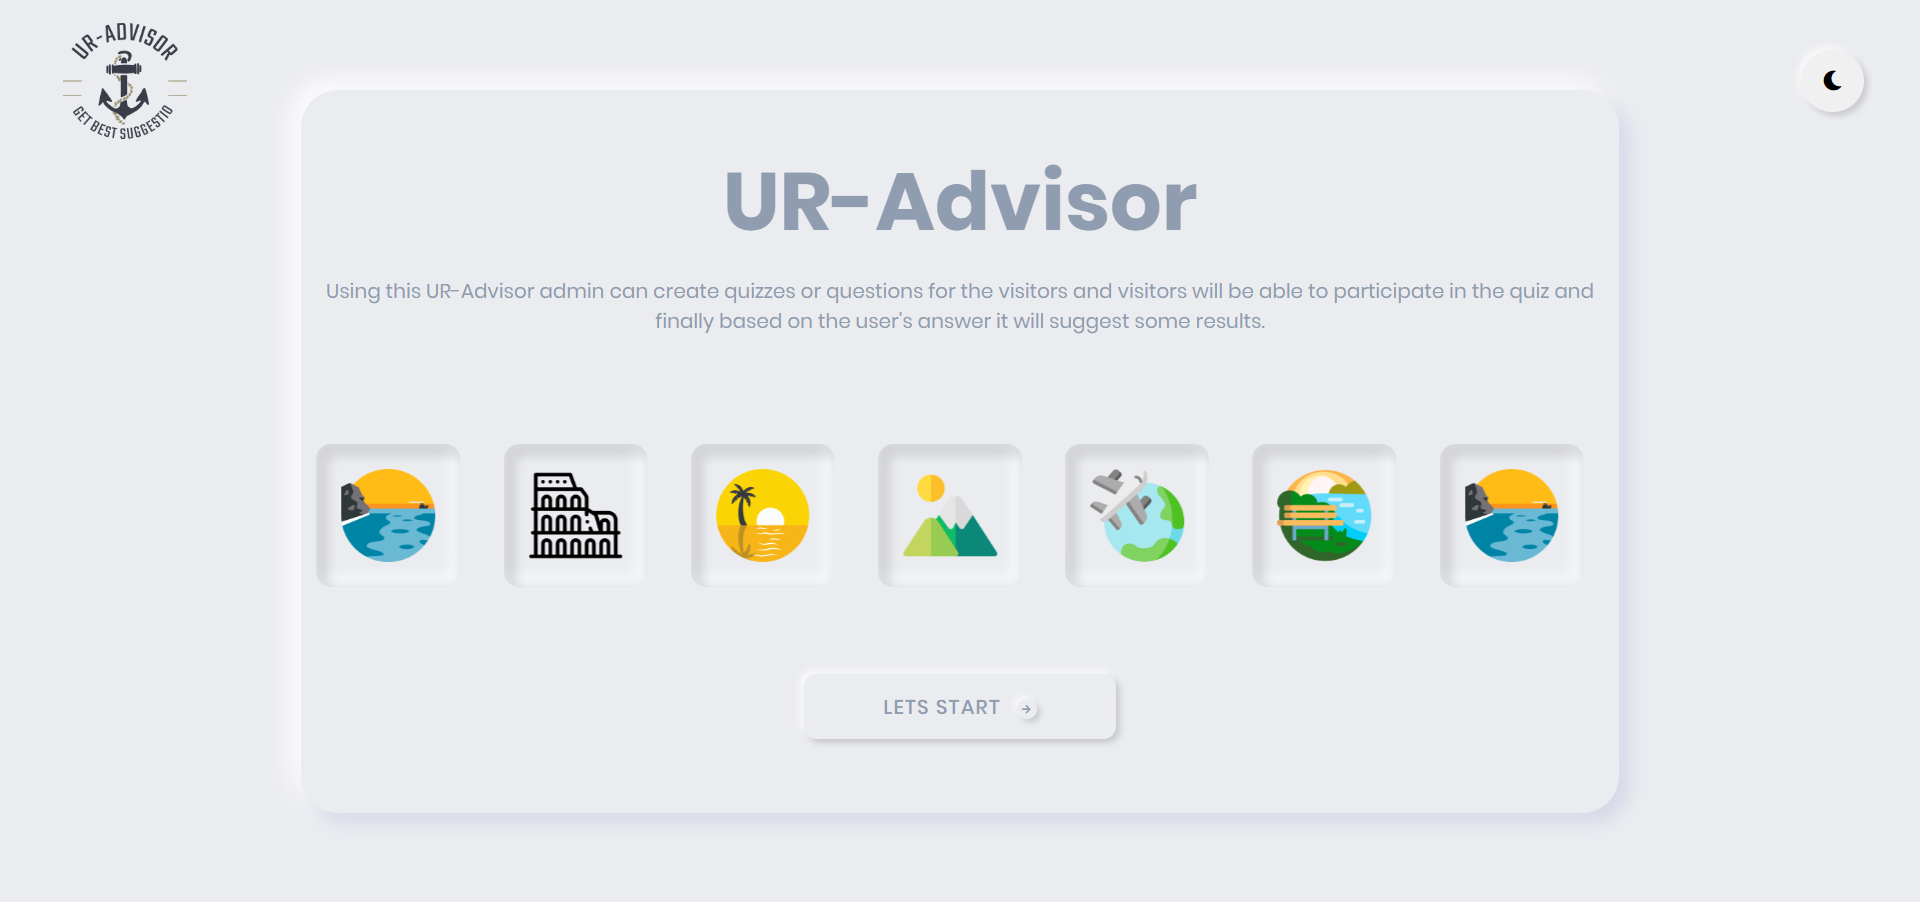
UR-Advisor is a light quiz/survey web application to develop quizzes with results that include content or product suggestions based on the user’s answers. Using this UR-Advisor admin can create quizzes or questions for the visitors and visitors will be able to participate in the quiz and finally based on the user's answer it will suggest some results. UR-Advisor is a PHP based web application built on the Laravel framework and Vue JS. It can help business owners and individuals to run their campaign.
Changelog
We have launched our new version 3.0.0 In the new version, we fixed some exacting bugs and added some new modules. The detail on the changelog is given below.
| Latest version 3.0.0 – February 7, 2024 |
|---|
| * Updated laravel version to Laravel 10 |
| * Updated PHP version to PHP 8 |
| * Admin login redirect issue fix |
| * Added subscriber answer preview |
| * Fixed previous bugs and issues |
| Version 2.0 published on 18 July 2021 |
|---|
| * Updated -Laravel version updated to latest Laravel 8 |
| * Added -Subscriber provided answer view. |
| * Fixed - Installation issue |
| * Fixed - Other issues |
| Version 1.0 – April 9, 2020 |
|---|
| * Initial Release |
Updating
We're happy to inform you that we've launched our new version 3.0.0. If you have already purchased it then you may be interested to update the system. But we are sorry to inform you that we have changed the internal structure of the system so the update may not work for you. But don't worry you are still able to use that updated version. What you can do is install the new version and then take the data from your old(Current version that you are using) and input data backup into the newly installed version. We are always available for support so feel free to inform us if you need any help with the update. Please stay with us :)
Server Requirements
The Laravel framework has a few system requirements. All of these requirements are satisfied by the Laravel Homestead virtual machine, so it's highly recommended that you use Homestead as your local Laravel development environment.
However, if you are not using Homestead, you will need to make sure your server meets the following requirements:
- PHP >= 7.3
- BCMath PHP Extension
- Ctype PHP Extension
- Fileinfo PHP extension
- JSON PHP Extension
- Mbstring PHP Extension
- OpenSSL PHP Extension
- PDO PHP Extension
- XML PHP Extension
Note: By default, most of the popular hosting provider has all of the above requirements. If you are having any issue to install the application feel free to inform us we will try to assist you with the installation :)
Installation
The installation of the UR-Advisor is super easy and similar like other PHP and laravel based systems. Please follow the below steps to install our UR-Advisor system.
Note: Here we will show the cpanel (Hosting) installation process. If you want to install the system in your cloud server or if you are interested to install it using FileZilla of if you want something else then let us know we will help you with the installation.
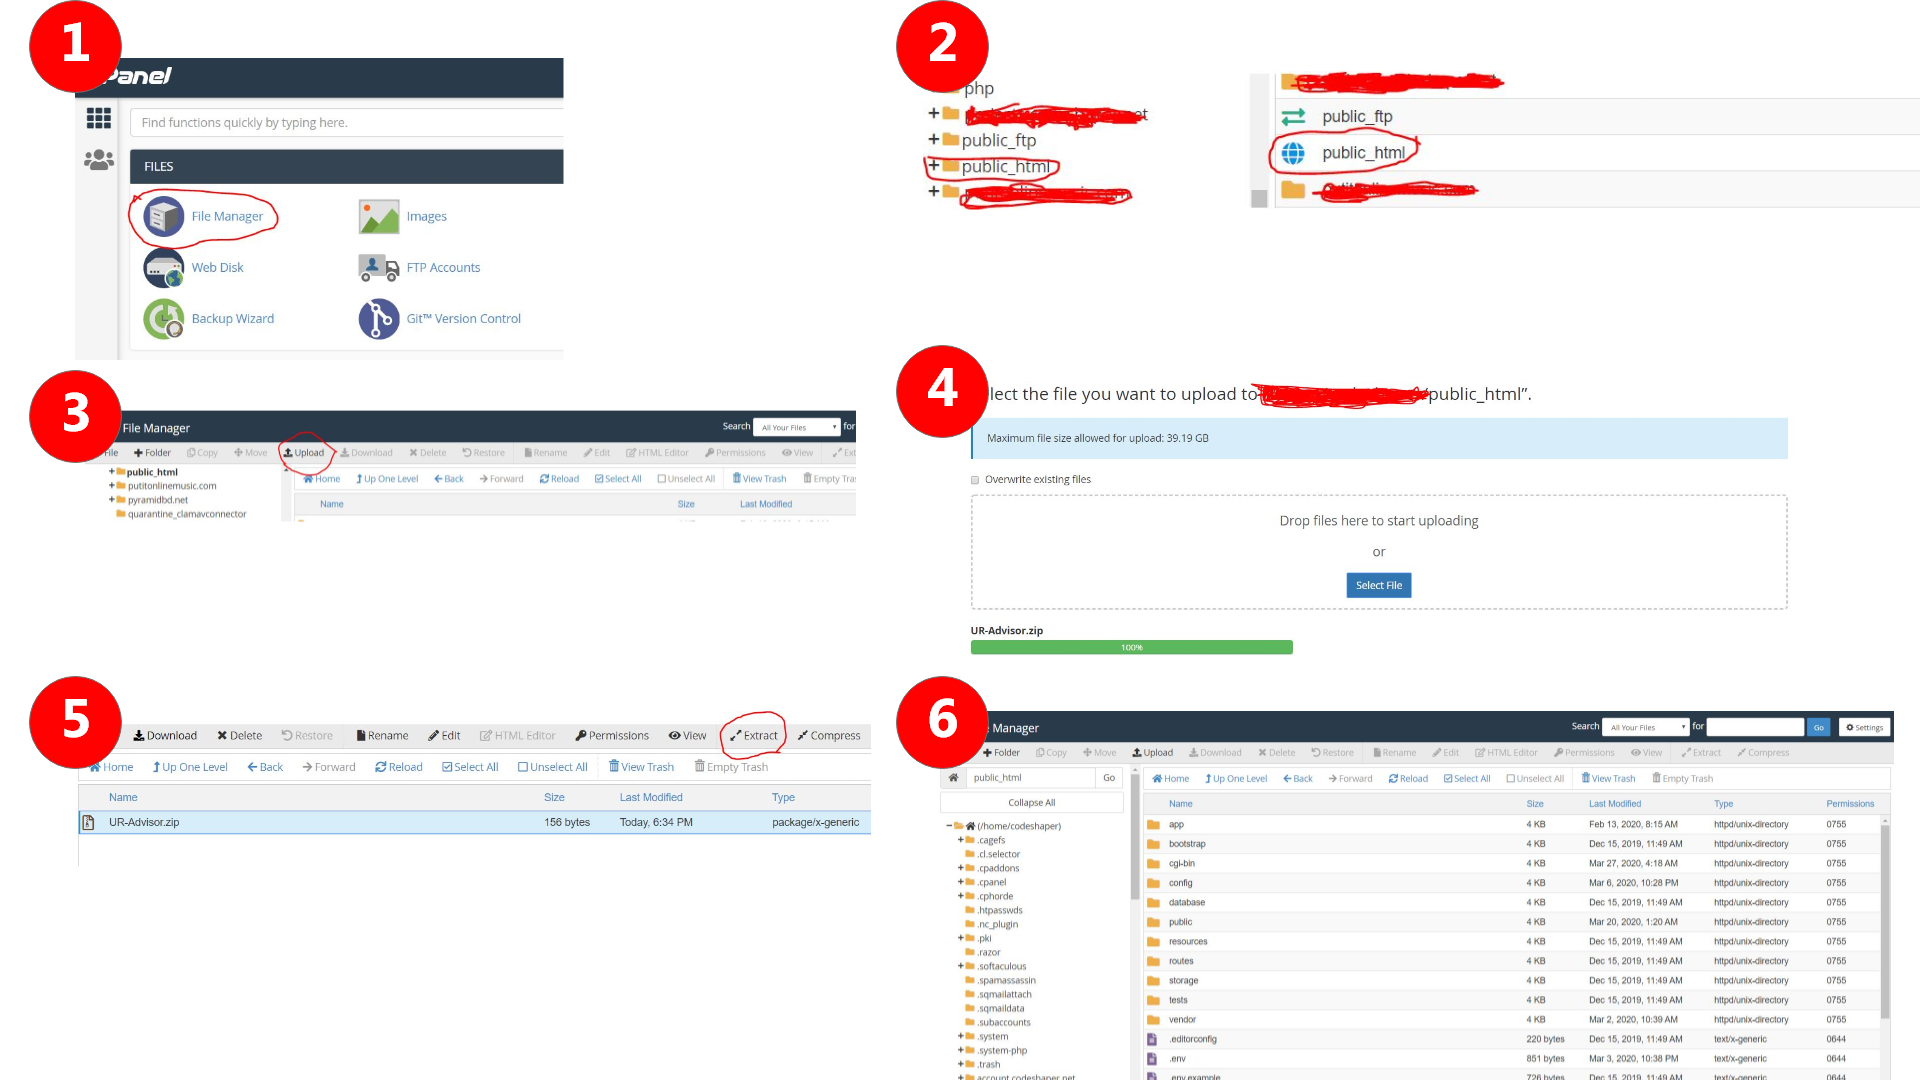
First of all, unzip the downloaded source code from Codecanyon. Find the folder UR-Advisor-V1.0 and inside it find the file UR-Advisor.zip inside it.
Login to your hosting panel and go to your root directory(public_html) and upload the source code UR-Advisor.zip
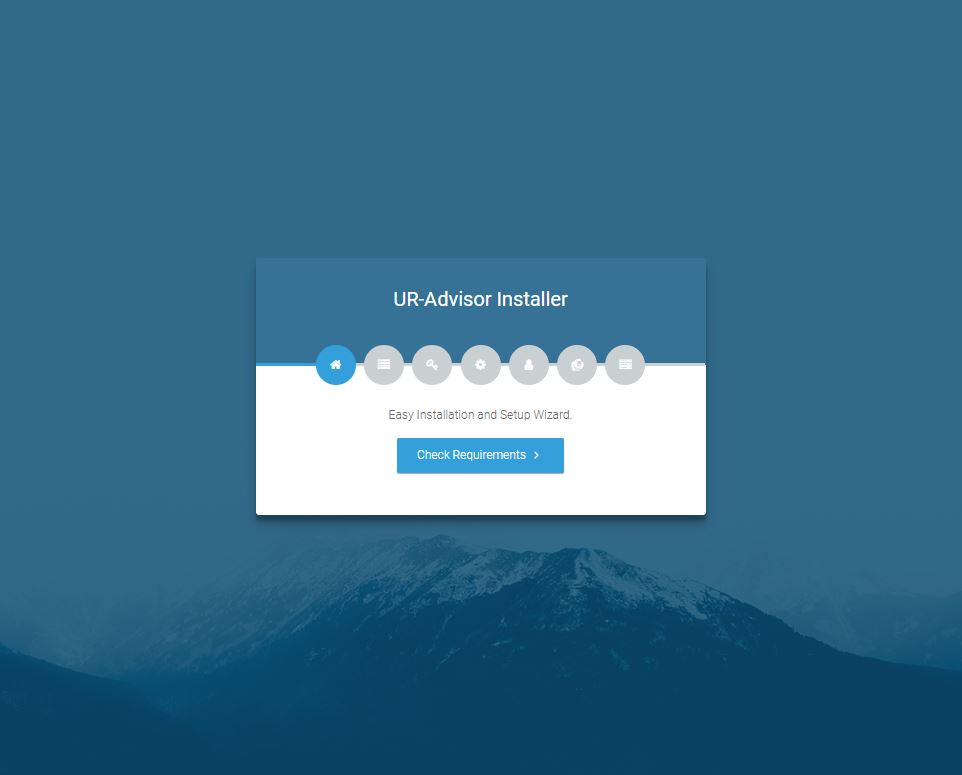
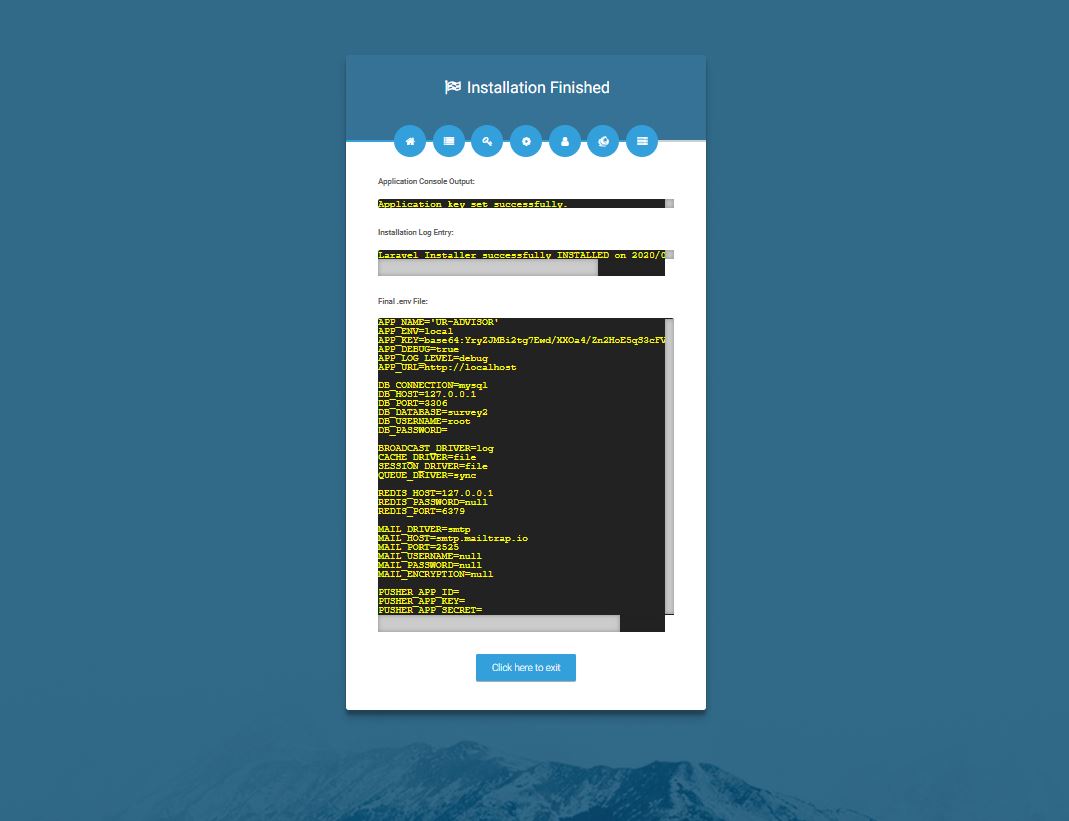
Open Browser with link URL: http://yourdomain.com/install (replace yourdmoain.com with your original domain name) then Follow the next instructions to install the UR-Advisor system. After opening the link you will get the install page like the below screenshot.
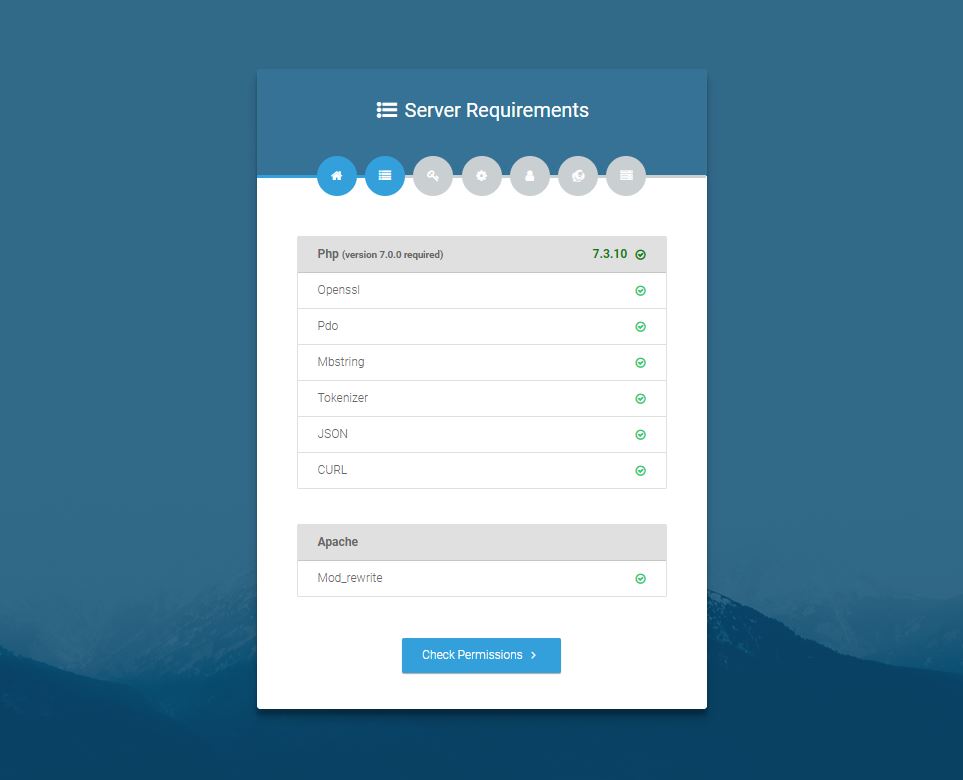
The below mentioned are the dependencies or extensions for the server that are essential components for installation. All the green checks would ensure the presence of all the above-mentioned dependencies. In case, if the system doesn’t have any of these dependencies already installed, a red cross mark would appear in the corresponding column of the missing component. So make sure to install all the dependencies and extensions to ensure the smooth running and installation of the app.
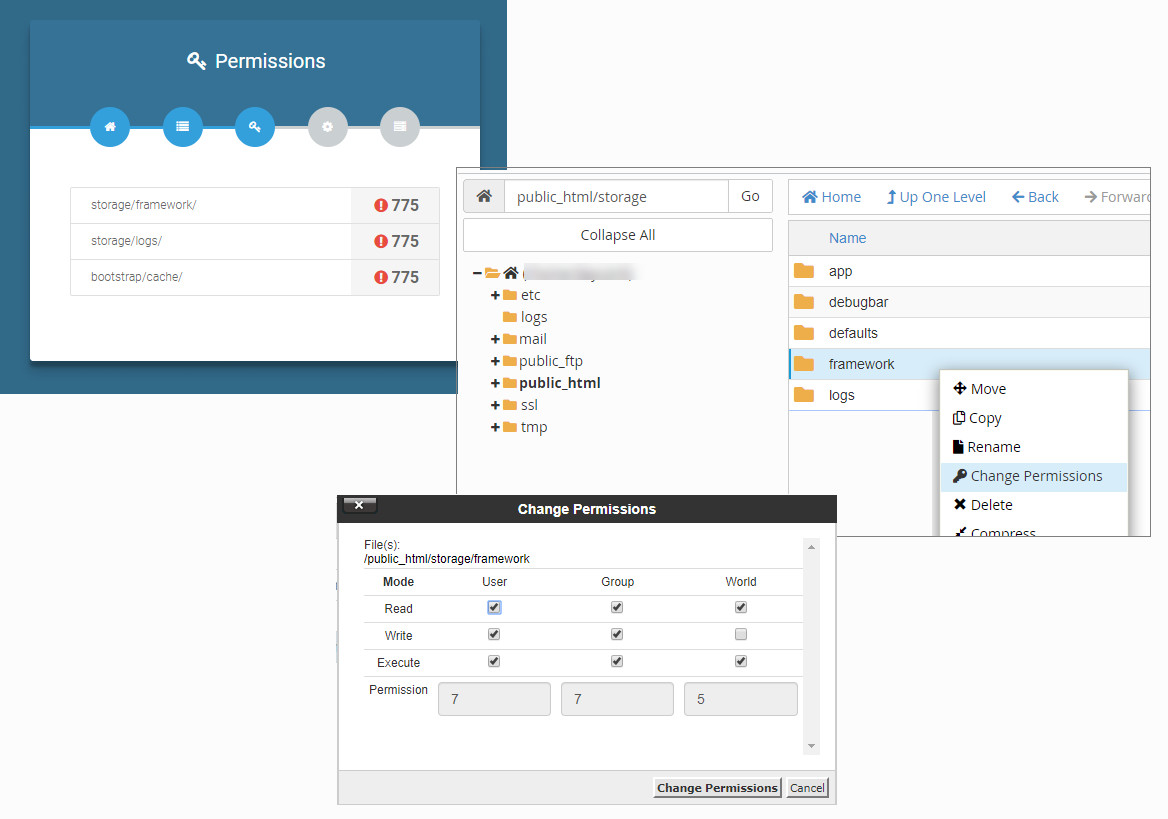
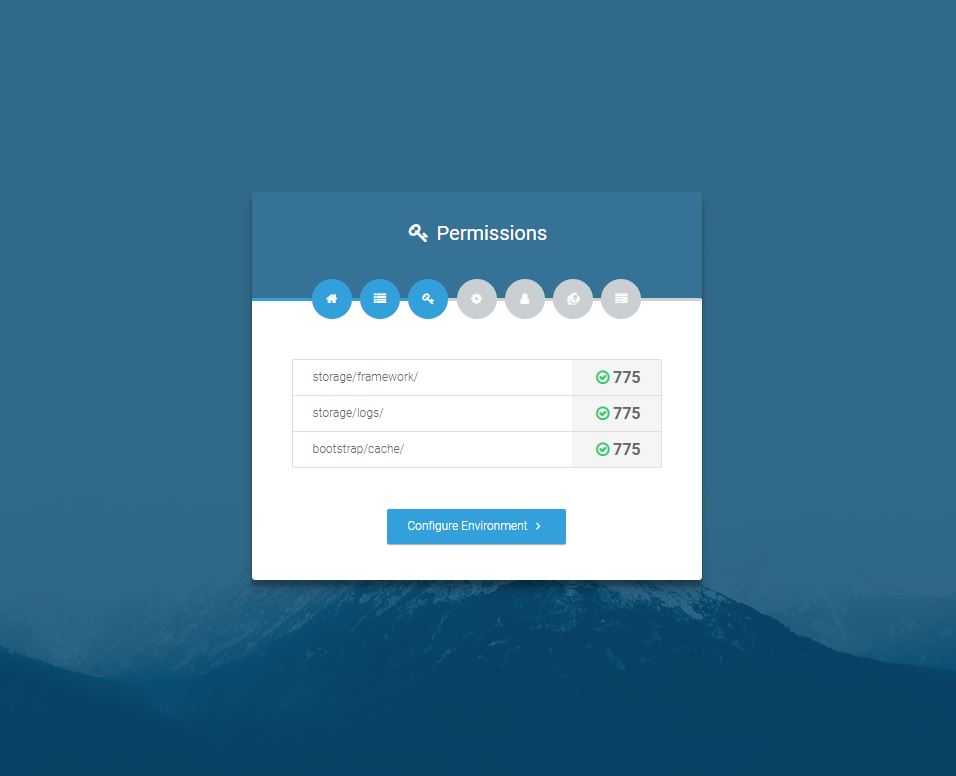
In this step, you need to grant the directed permissions respectively for instance.
| Storage/framework/ |
775 |
| Storage/logos/ |
775 |
| Bootstrap/cache/ |
775 |
Open your Cpanel, and open your root directory then go to the Storage folder there you will find two folders(framework, logos) and the other(cache) folder you will found in the Bootstrap folder. Select any of the three folders (For example framework) right-click on this, and now click on the change permission, enter the relevant vale 775, and click on the change permission on the bottom again. In the same manner, grant permission for the rest of the two folders by right-clicking on the folder and selecting change permission.
You may check the below screenshot:
In the next step, you need to complete the environment settings wizard.
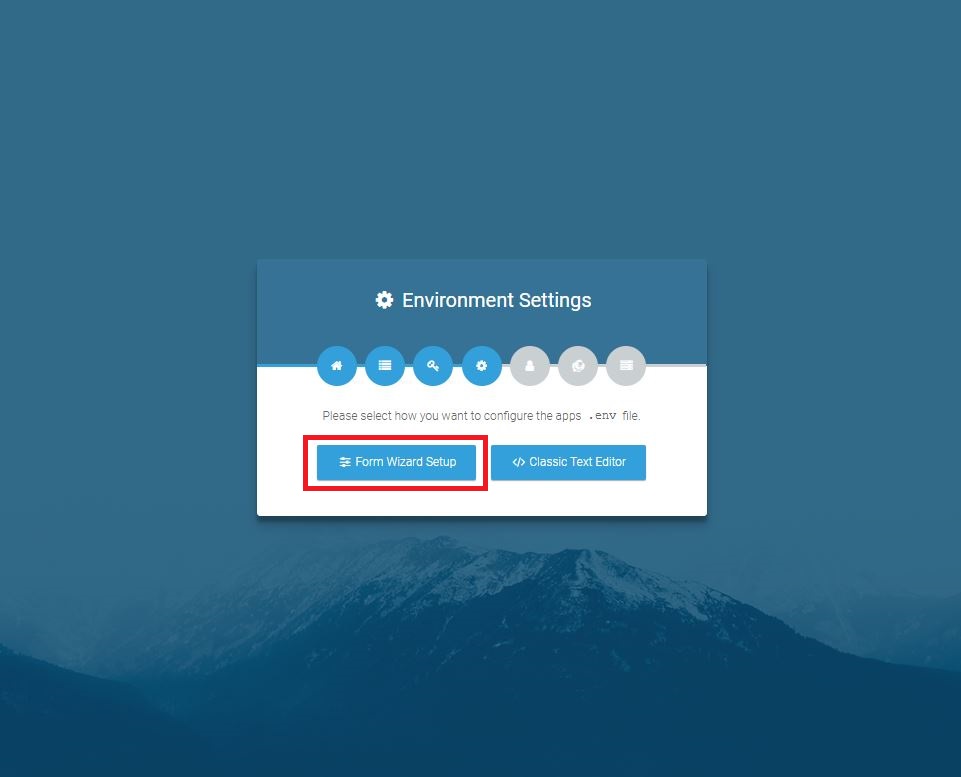
In this step continue entering some, your hosting information like DB host, DB Post, DB Name, User of DB and Password then press Setup Application button to next to Application Step Or Edit .env file for install DB.
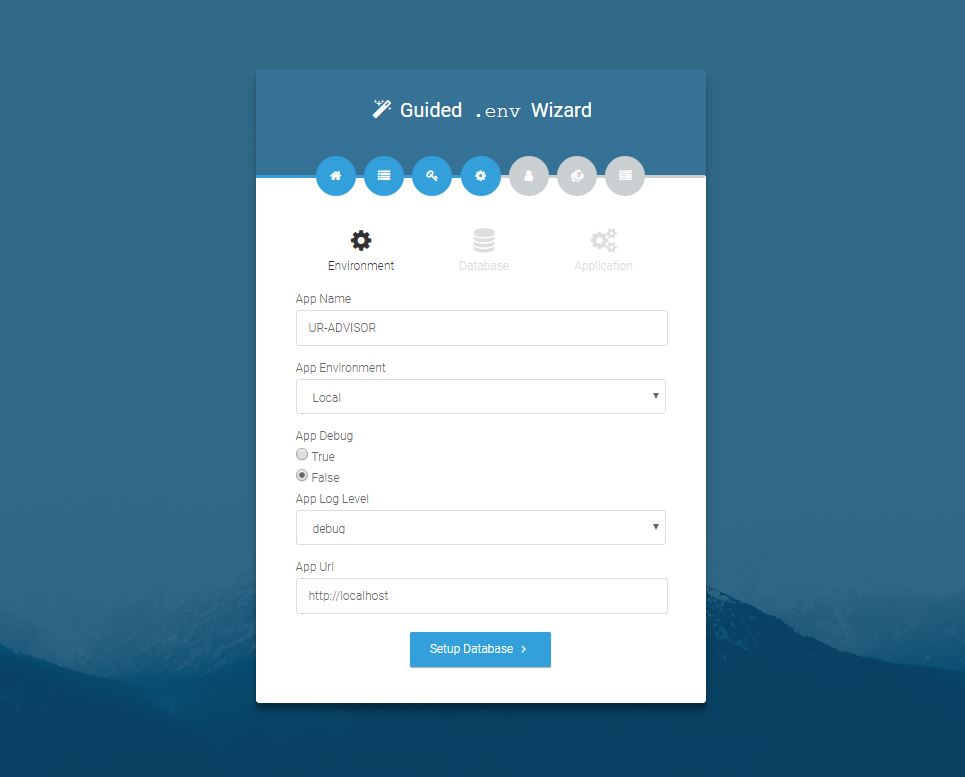
You need to enter the following information for environment setup.
| App Name | Name of the application. You can give it any name. |
| App Envrionment | For the server-side installation choose the Production mode. |
| App Debug |
By clicking the true, all the errors would be shown By clicking the false, no errors would be shown.(Recommended) |
| App Log Level | App Log system. Keep the selected one. |
| App Url |
Default localhost You can enter your domin here.(Recommended) |
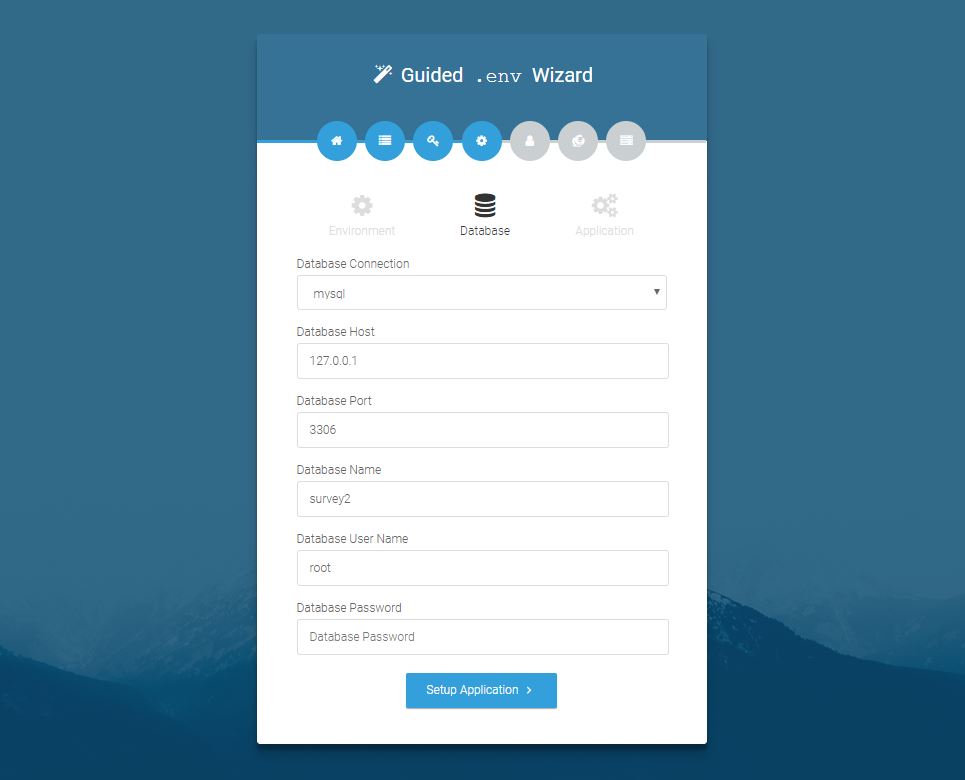
You need to enter the following information for database setup.
| Database Connection | Database connection type. Keep the selected one(mysql). |
| Database Host | Database host ip. Keep the selected one(127.0.0.1). |
| Database Port | Database port number. Keep the selected one(3306). |
| Database Name | Name of your newly created database. |
| Database User Name | Name of your database user name. |
| Database Password | your databse password |
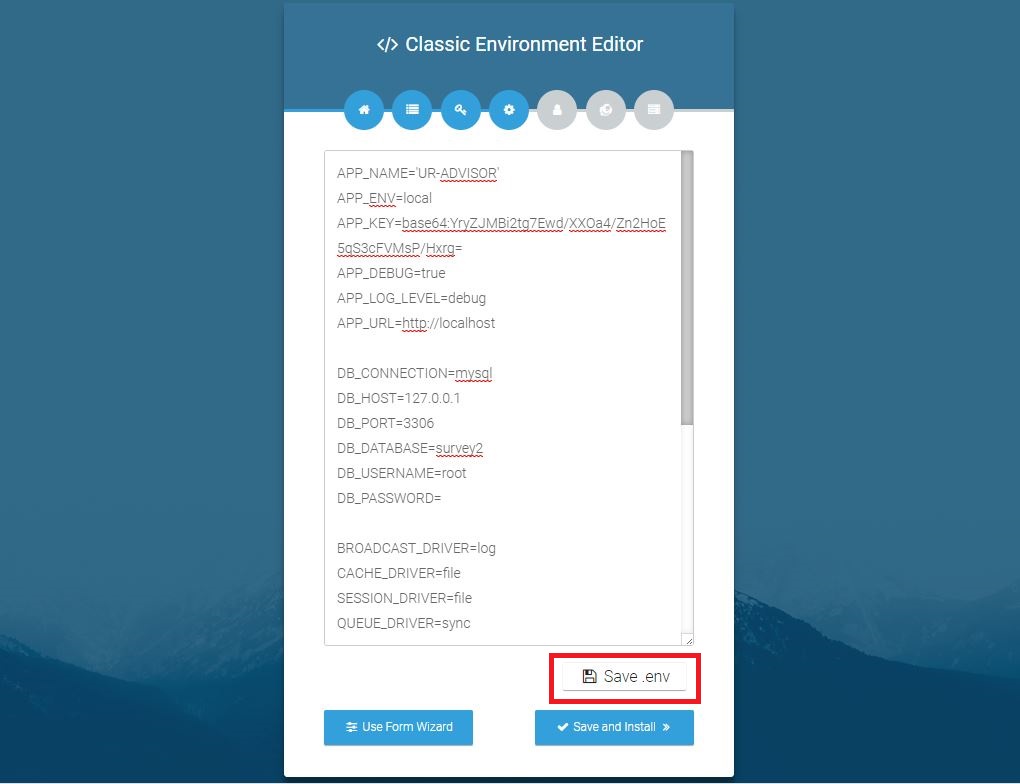
For classic editor you will get all of the settings(.env file) together
In this step, you need to create an admin account. Please create an admin account by providing the following information.
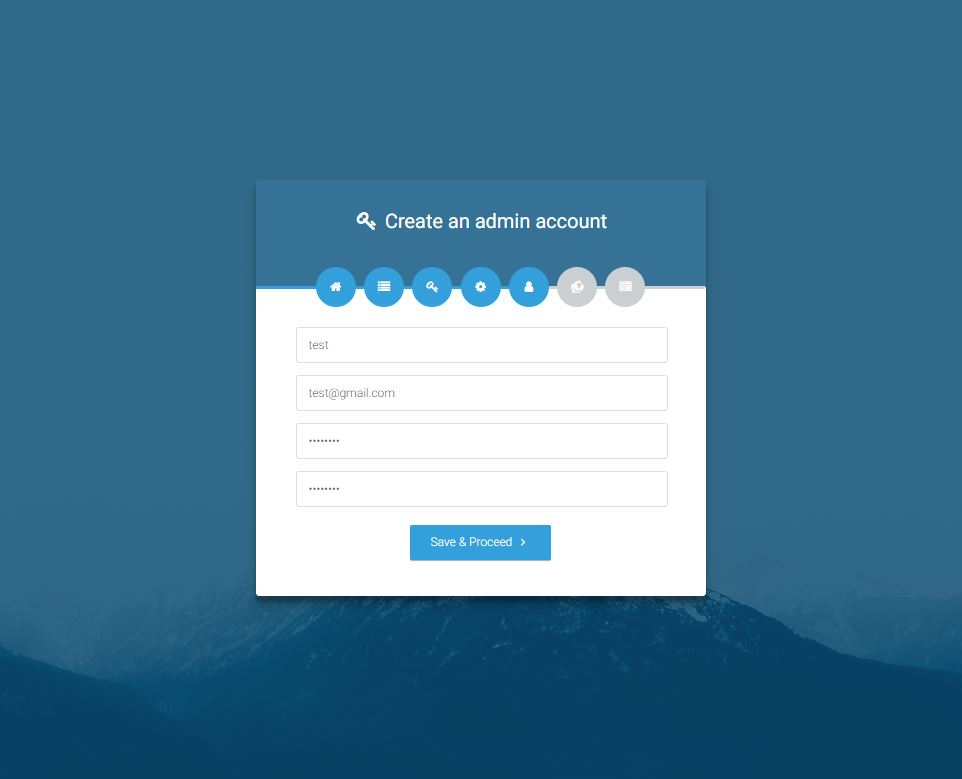
You need to enter the following information for database setup.
| Name | Provide a valid name. |
| Provide a valid email. | |
| Password | Use a strong password more the 8 characters. |
The final step and in this step you need to provide some information to step the application. Please check the below screenshot and fill the form.
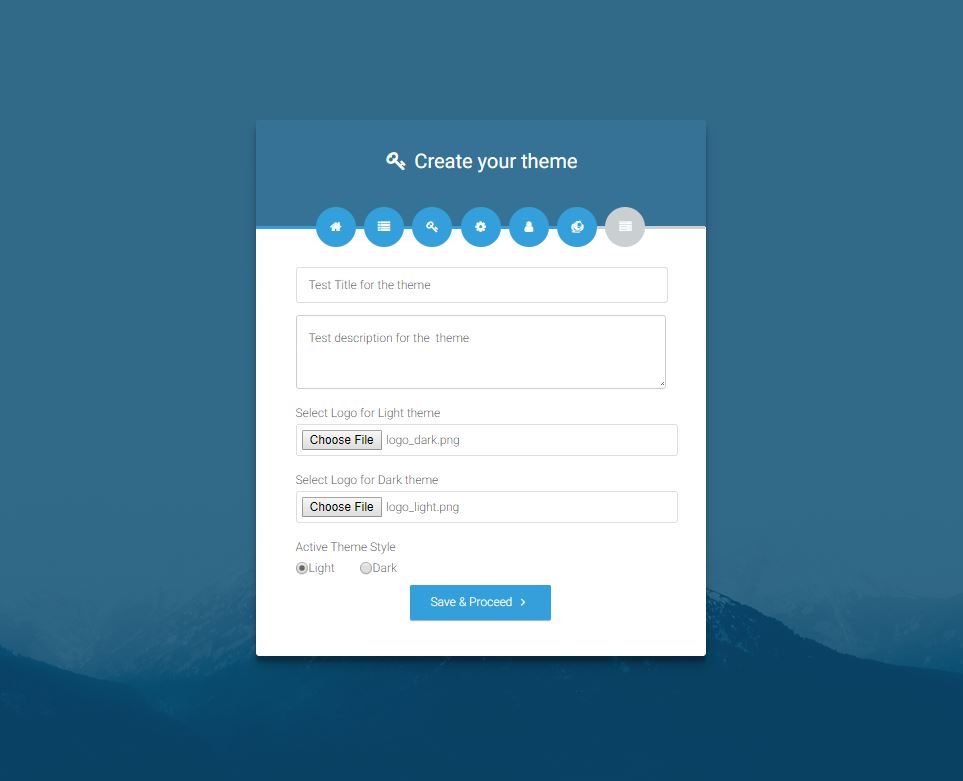
You need to enter the following information for system setup.
| Title | Enter the title of the system. Please keep it max 80 characters. |
| Short Description | Short description of the system. Please keep it max 160 characters. |
| Light Theme Logo | Logo for the light version frontend. We recommend you to use a dark png logo with size 95px X 95px |
| Dark Theme Logo | Logo for the dark version frontend. We recommend you to use a white png logo with size 95px X 95px |
| Active Theme Style | Default theme style for the frontend. You can use any of them. |
Note: If you are having any problem with the installation process then feel free to contact us(support@codeshaper.net) and we will help you with the installation.
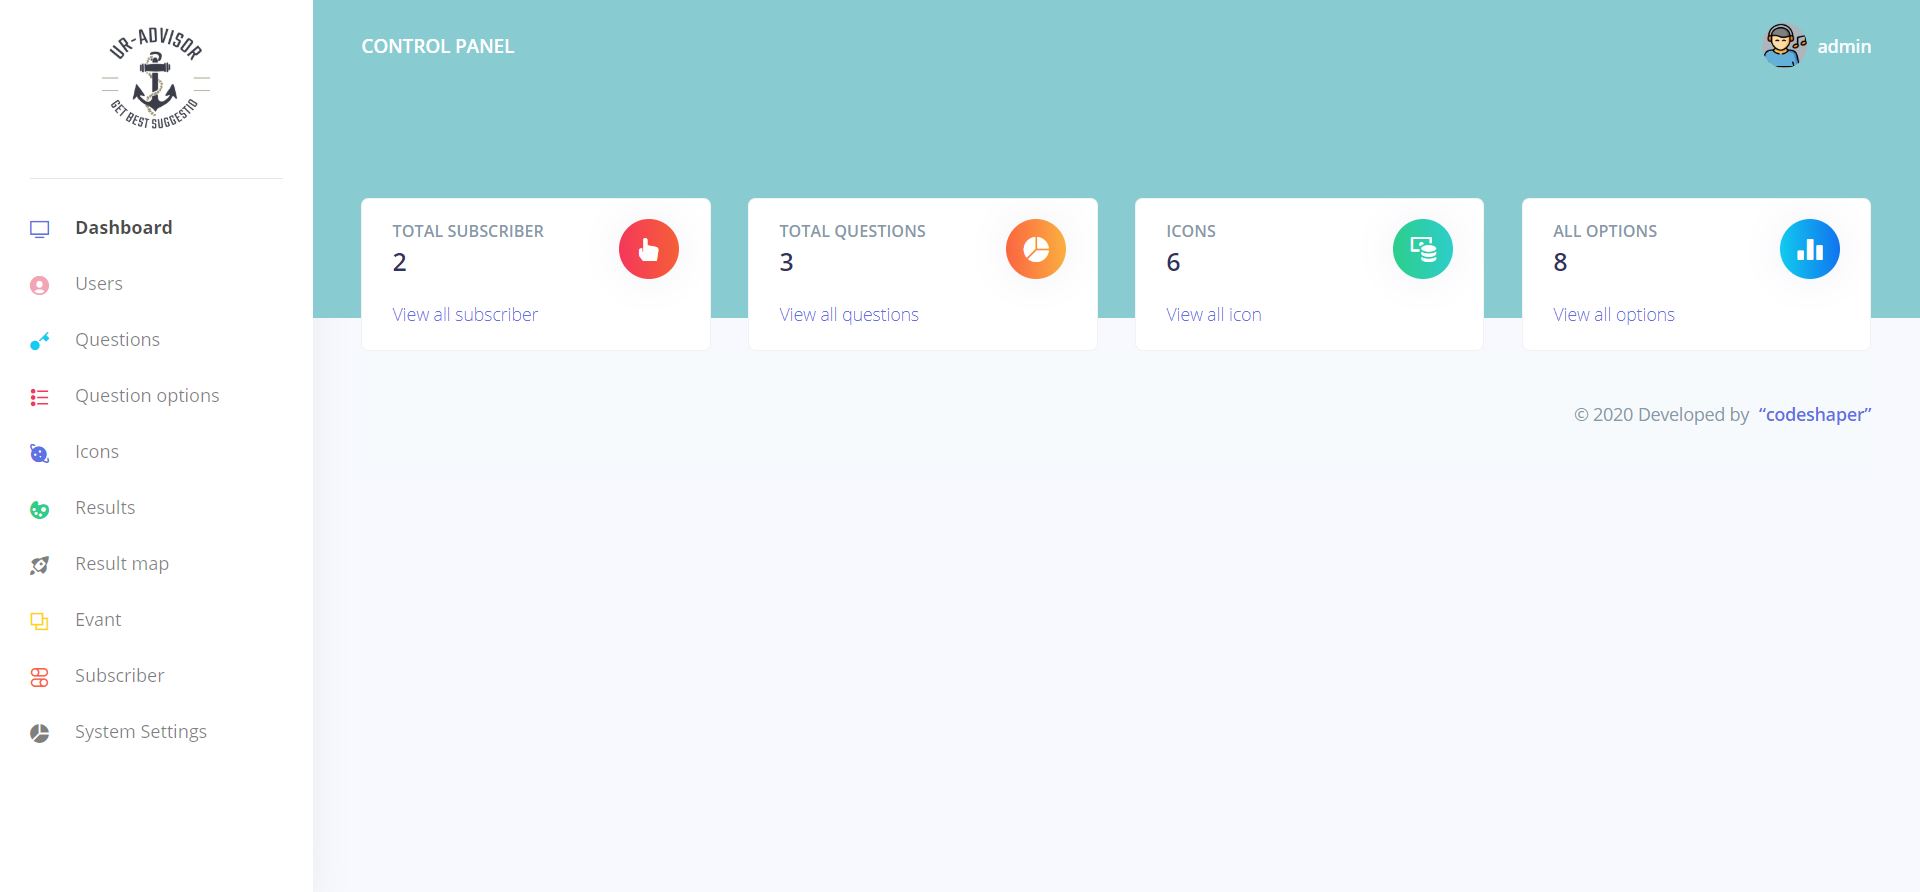
Dashboard
The page that you are going to after login to the system. From this page, you will be able to see an overall overview of the system. From here using the last side nave you can navigate to any other page.
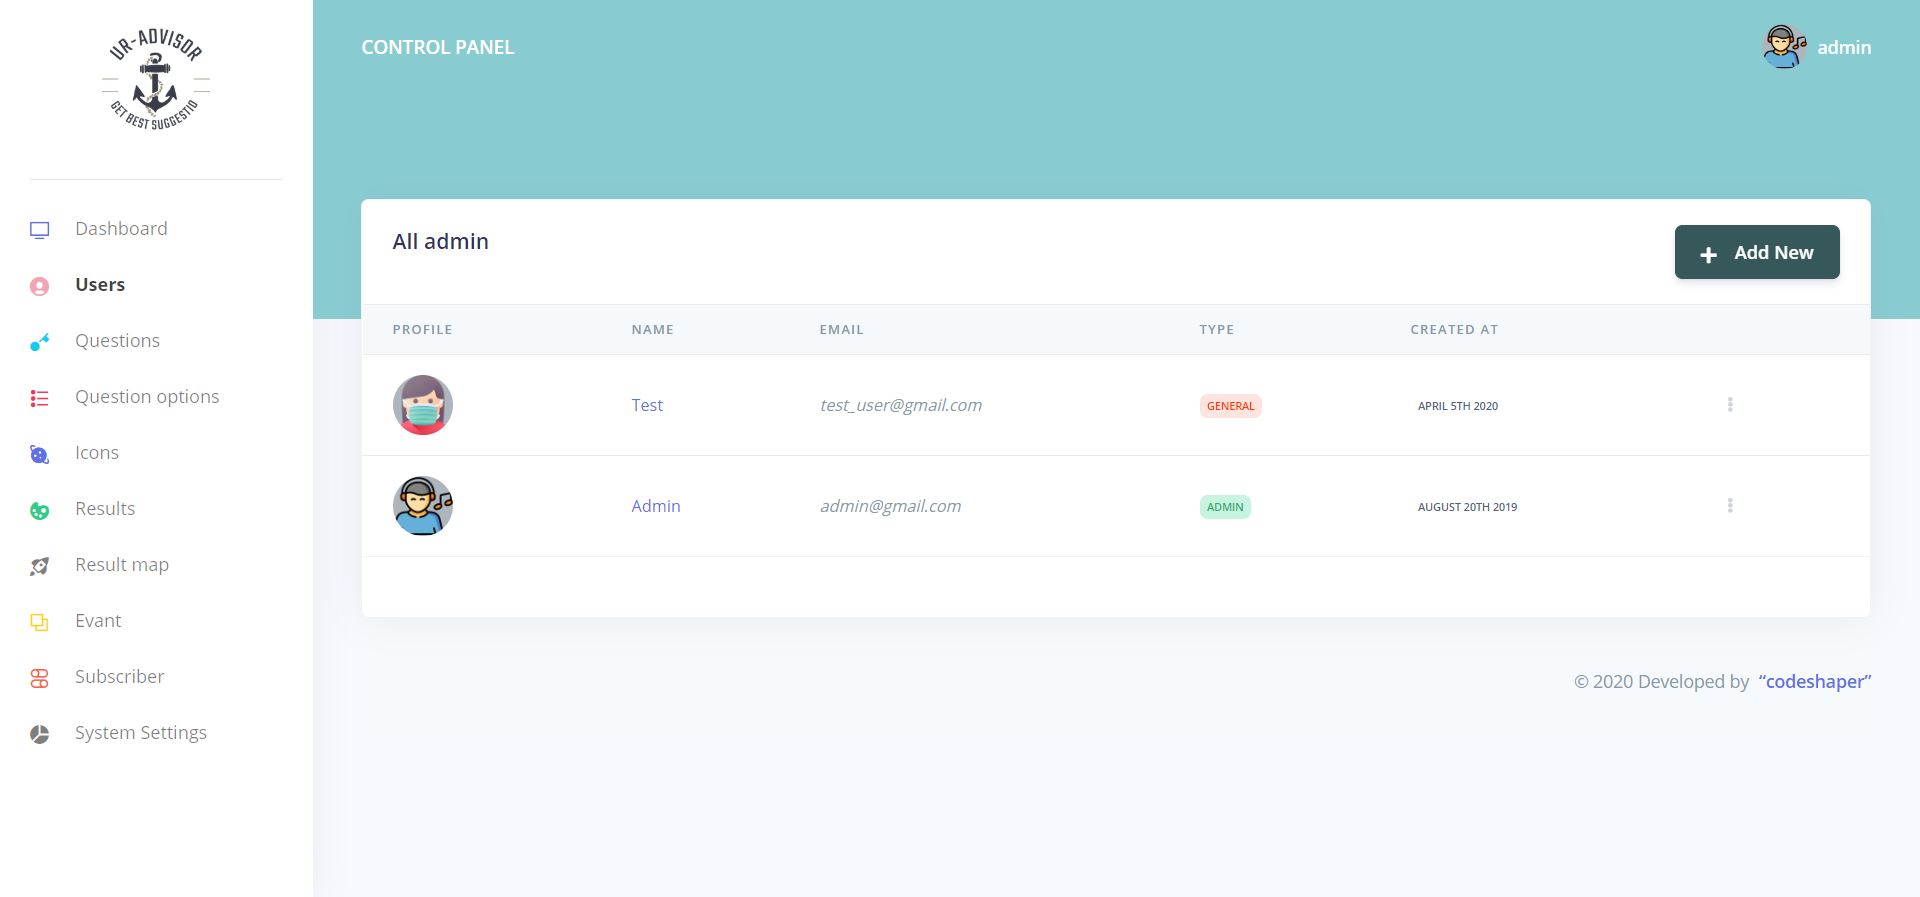
Users
This page contains all of the users of the system. From this users page, you can create a new user, edit existing user account and delete a user account.
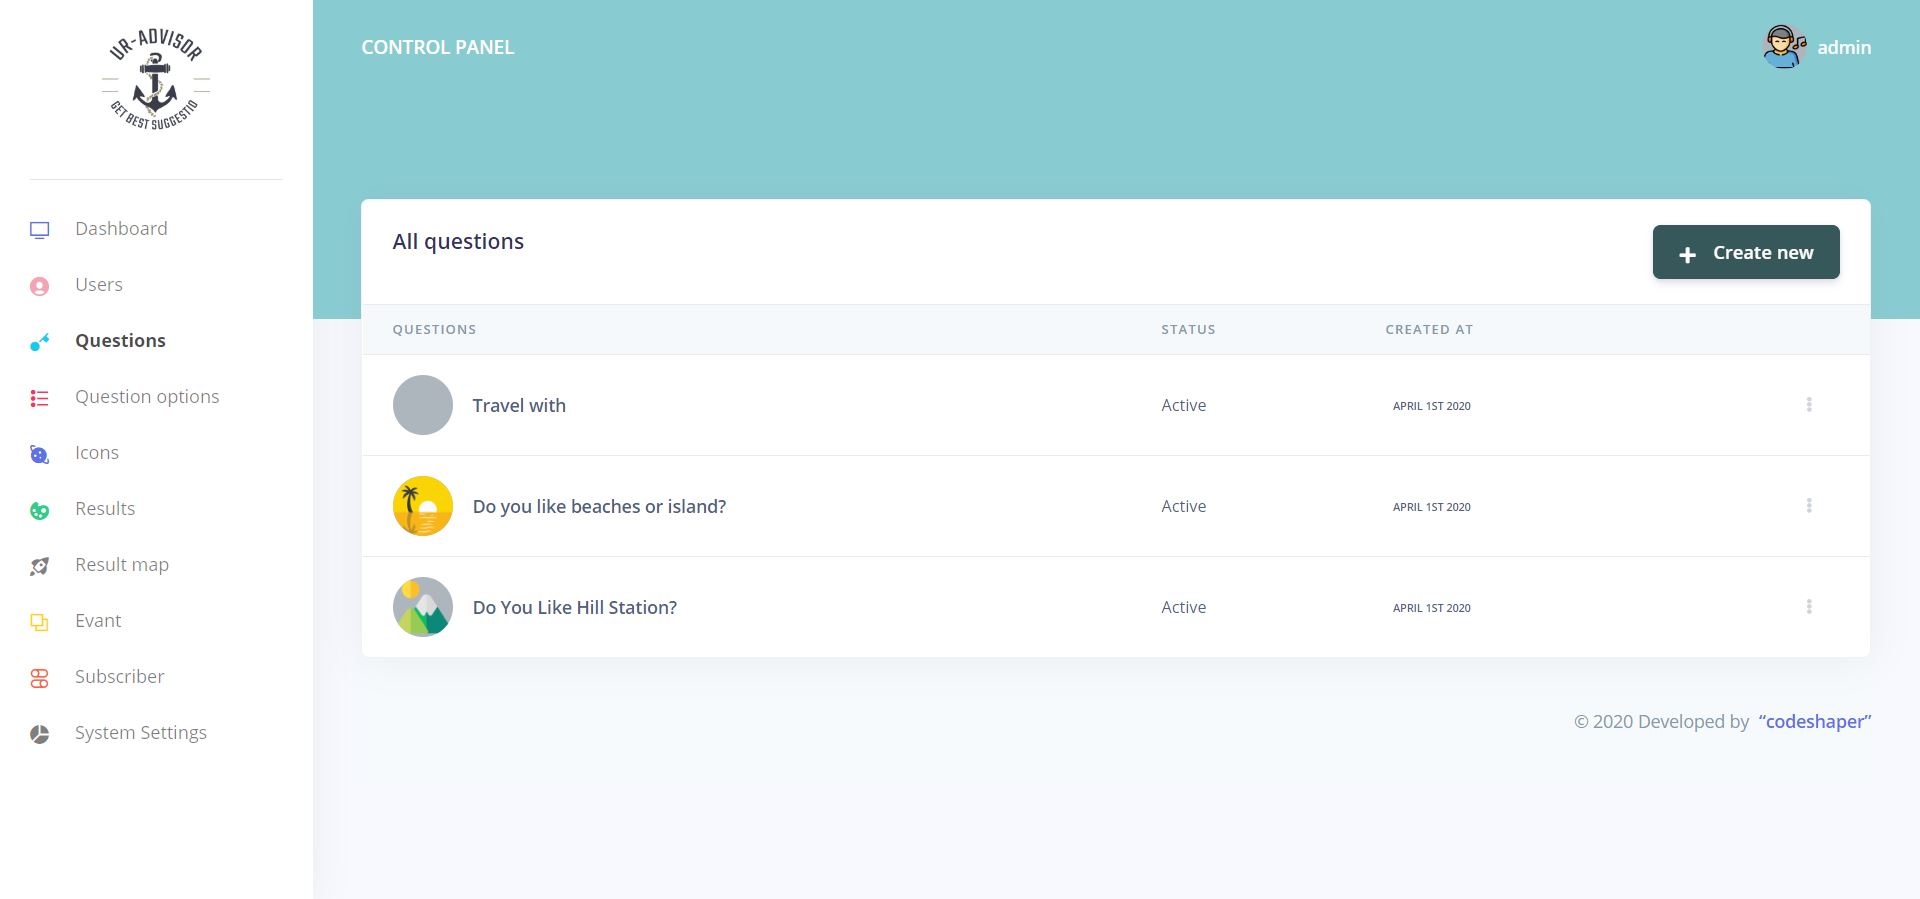
Questions
The questions page contains all of the questions and the questions will be displayed in the frontend site. From here you can create questions as much as you want. You are also able to edit or delete an existing question.
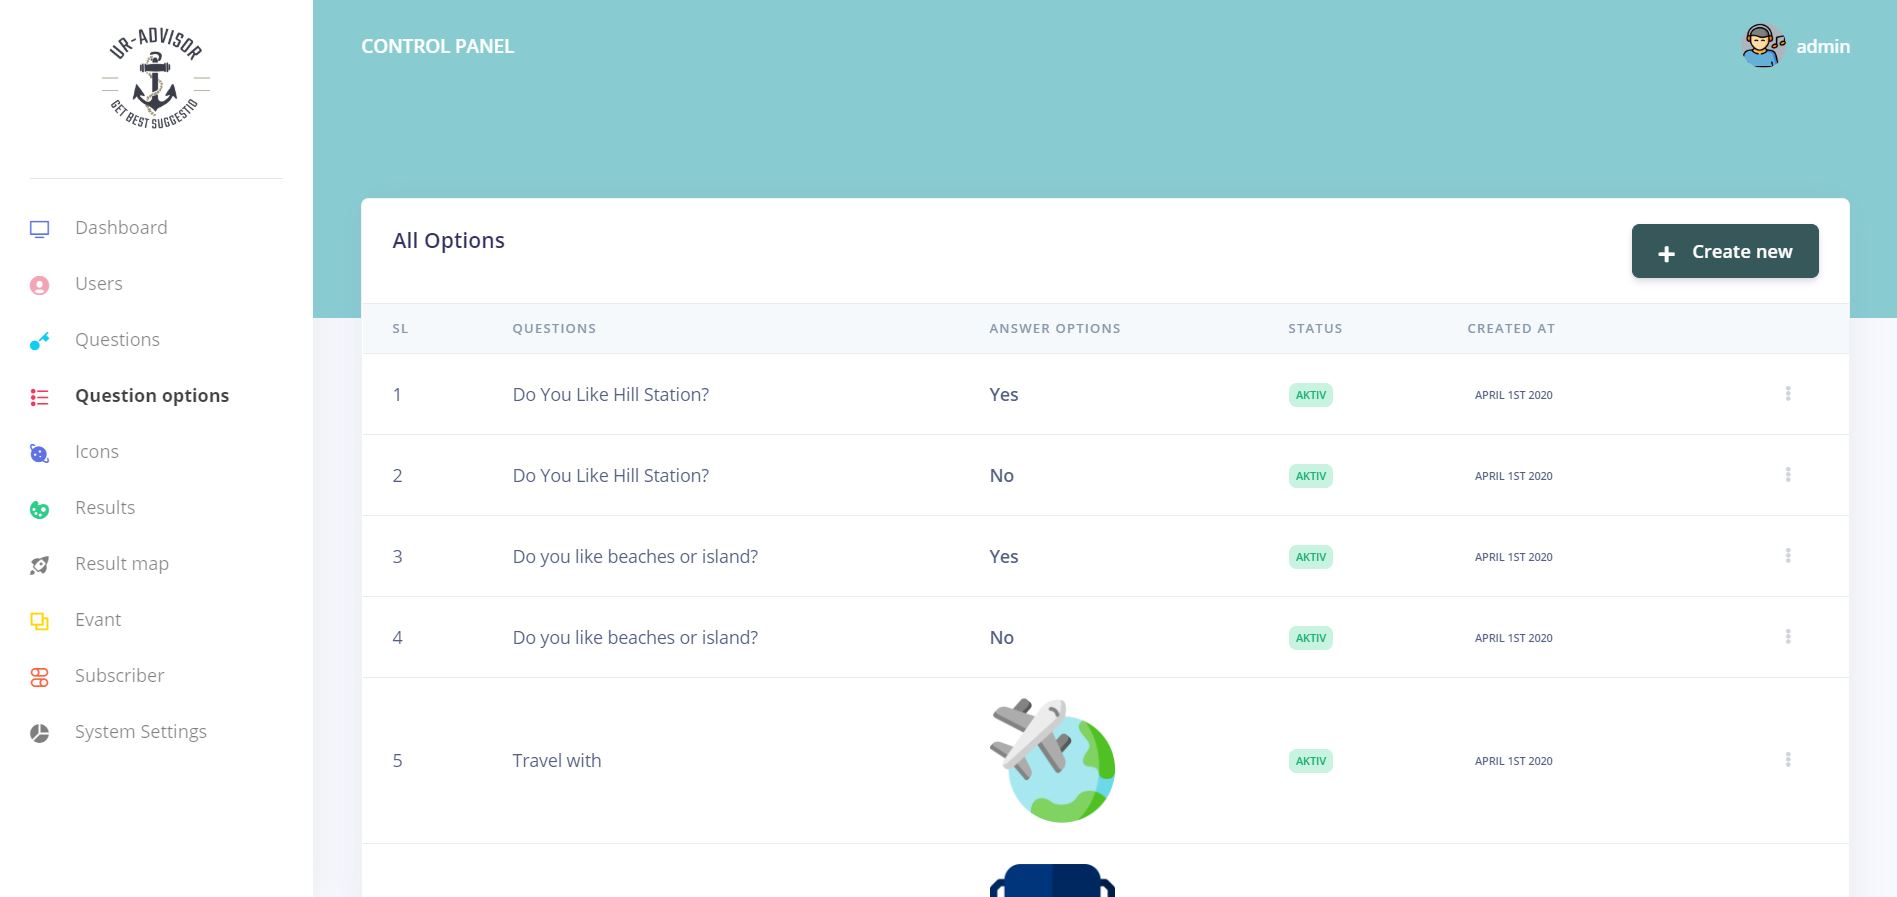
Question Options
The question options page contains all of the options for each question. Each option must belong to a question. For creating an option you need to select a question. You can also edit or delete an existing question option.
Icons
This page contains all of the icons which can be used in the system. You can add, edit and delete icons from here. The icons will be used in the result page.
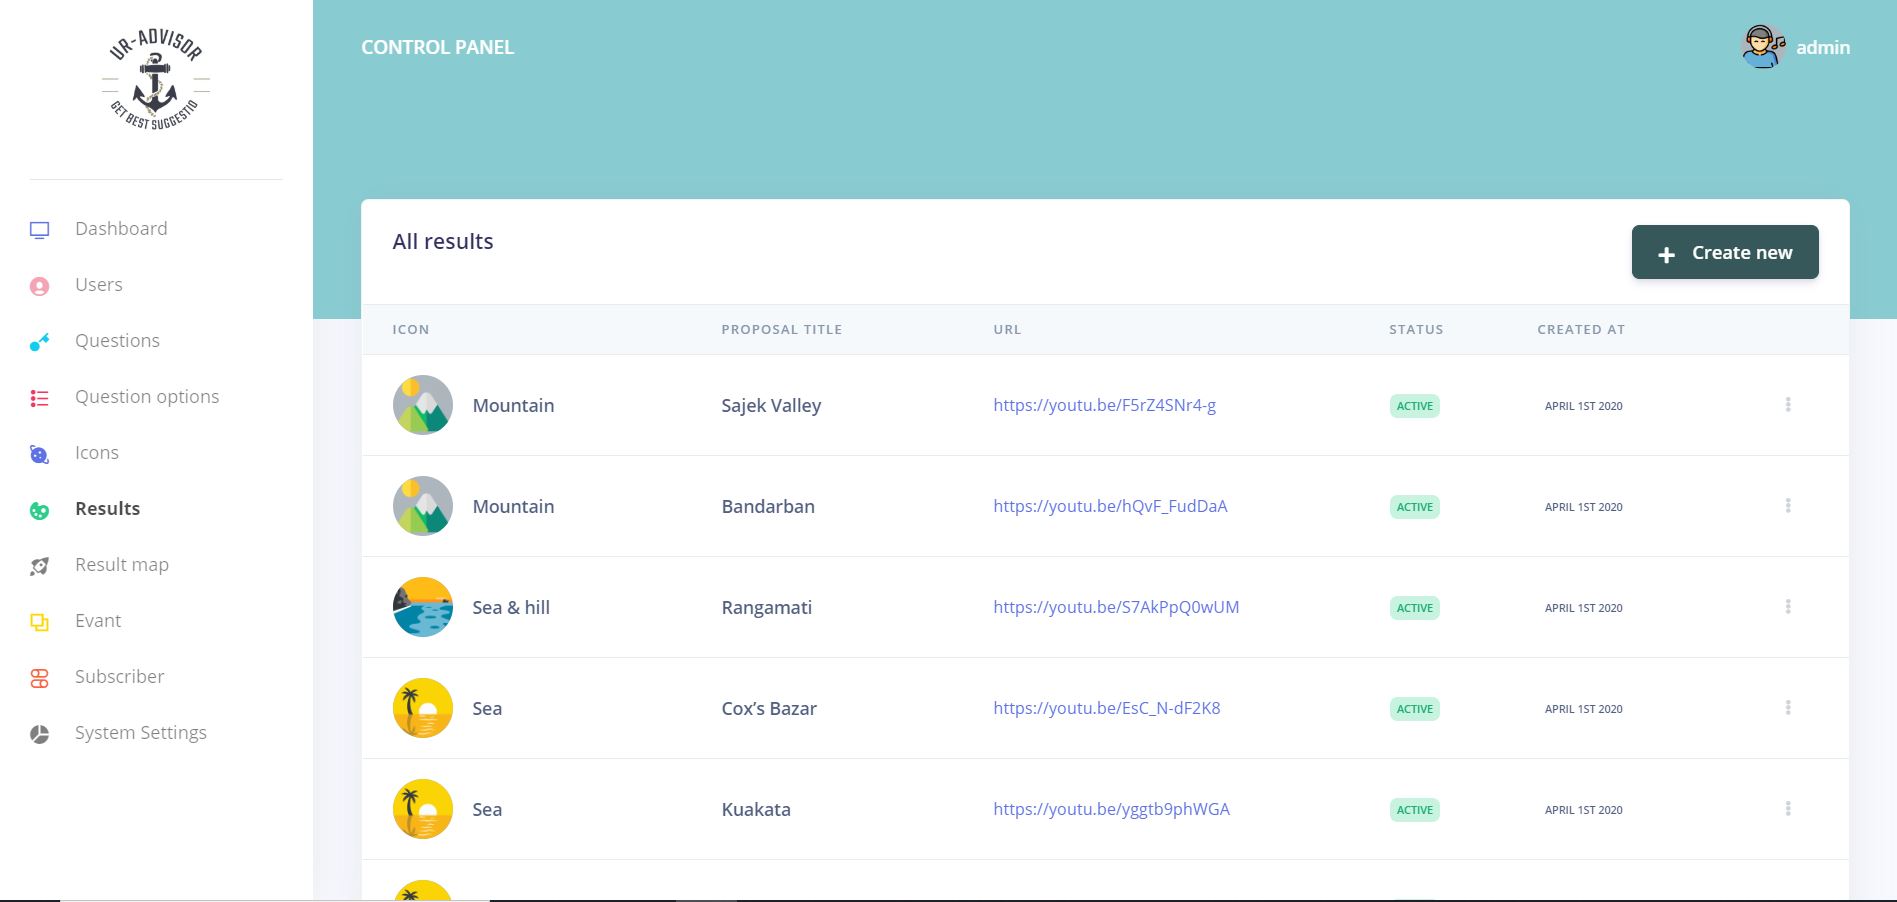
Results
The result page contains all of the results which will be displayed after the completion of the survey. You can add, edit and delete results from here. Later you will be able to map your results using the Result map menu.
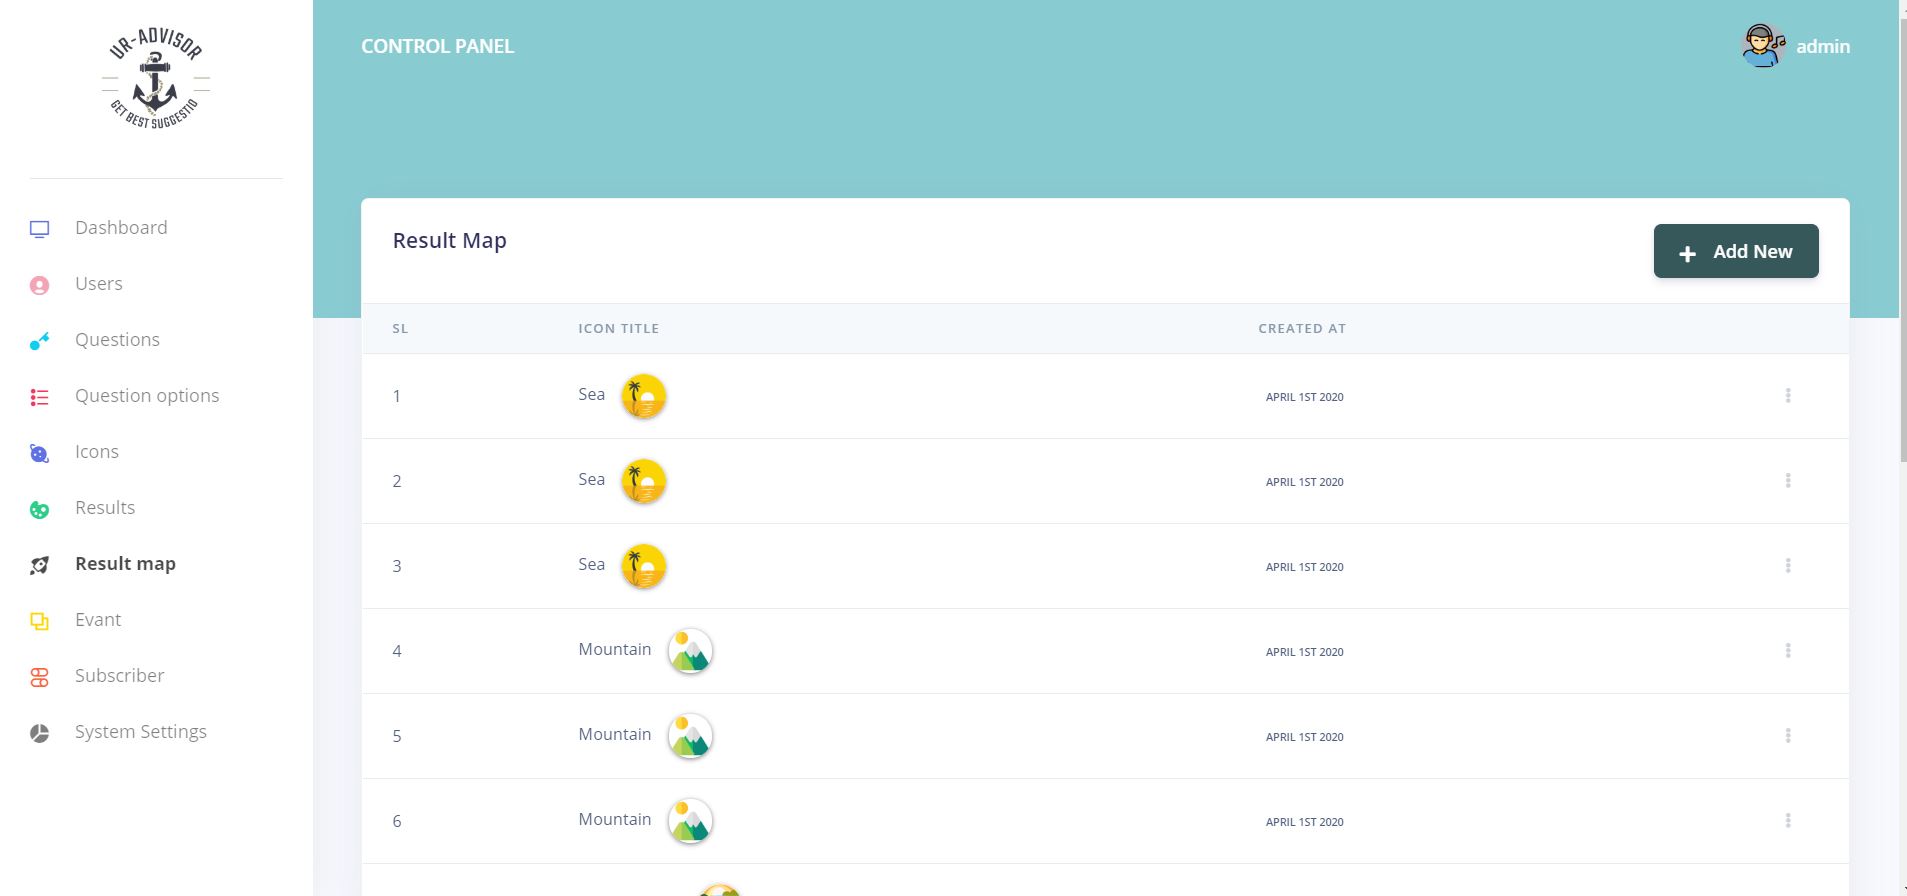
Result Map
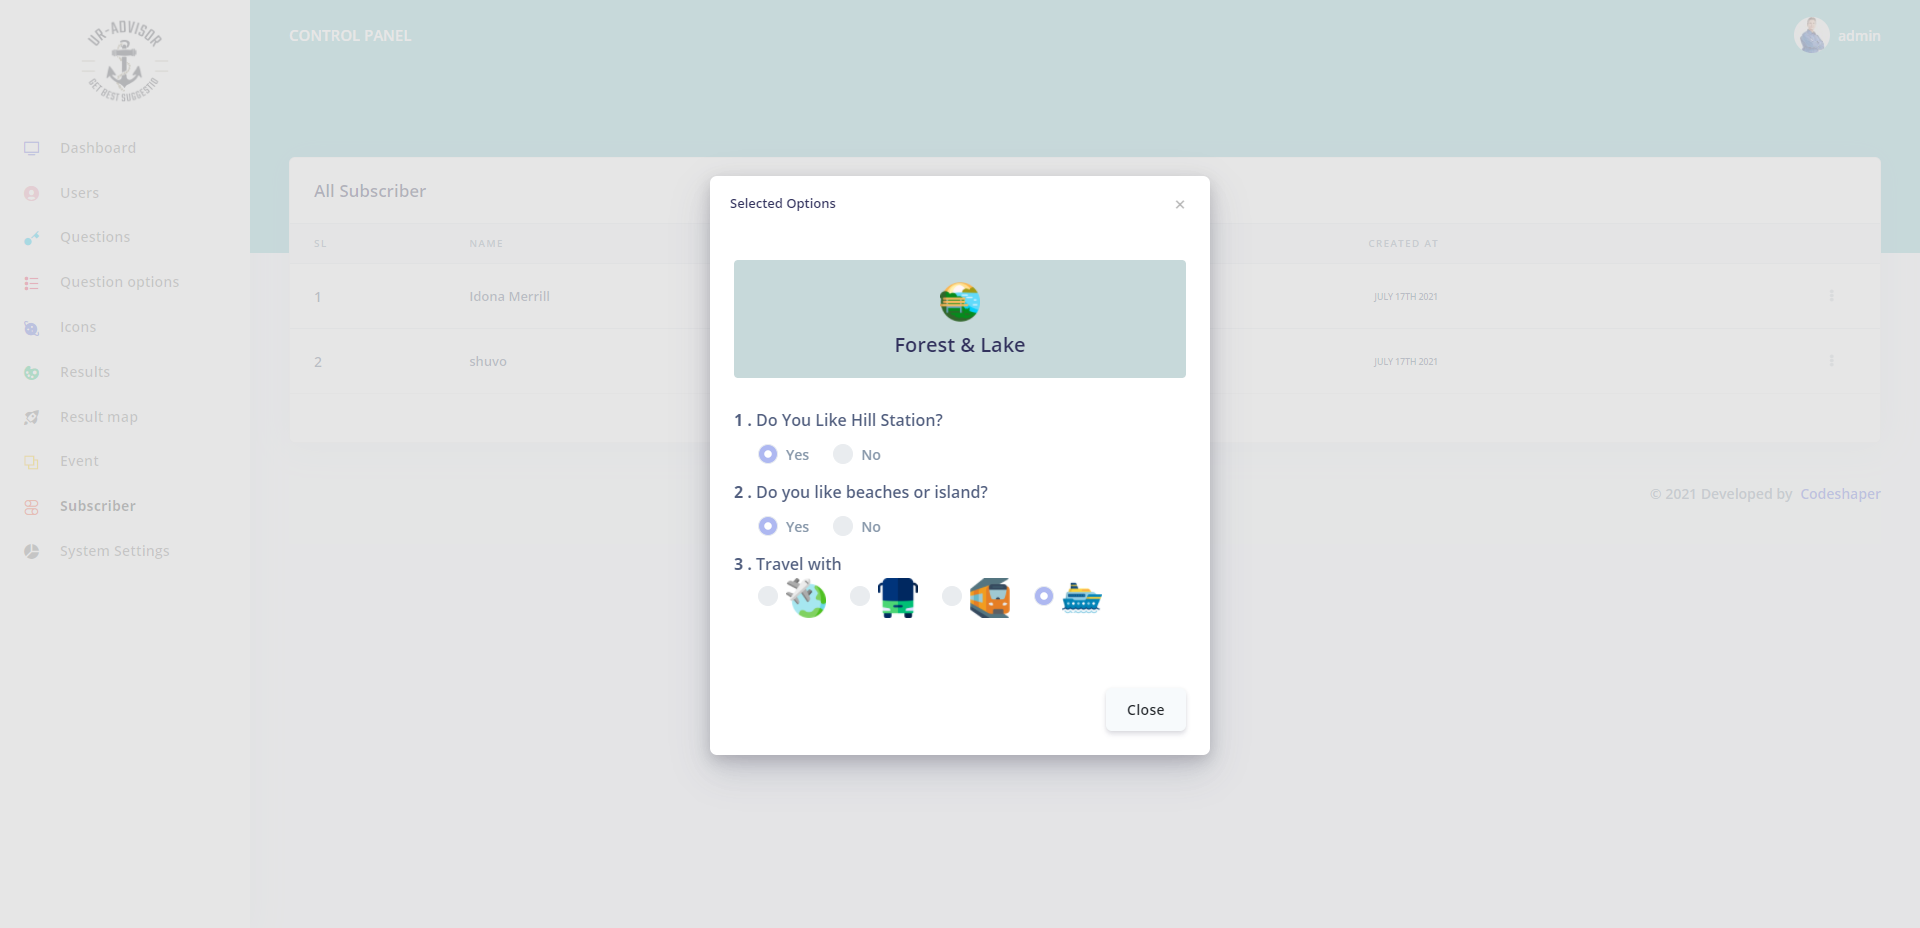
The most important page of the system. This is the logical page. On this page, you need to set the logic for the questions. You can map your results with respect to questions using this menu. You can add, edit and delete the resulting map from here. For mapping, a result selects the appropriate answers and the icon.
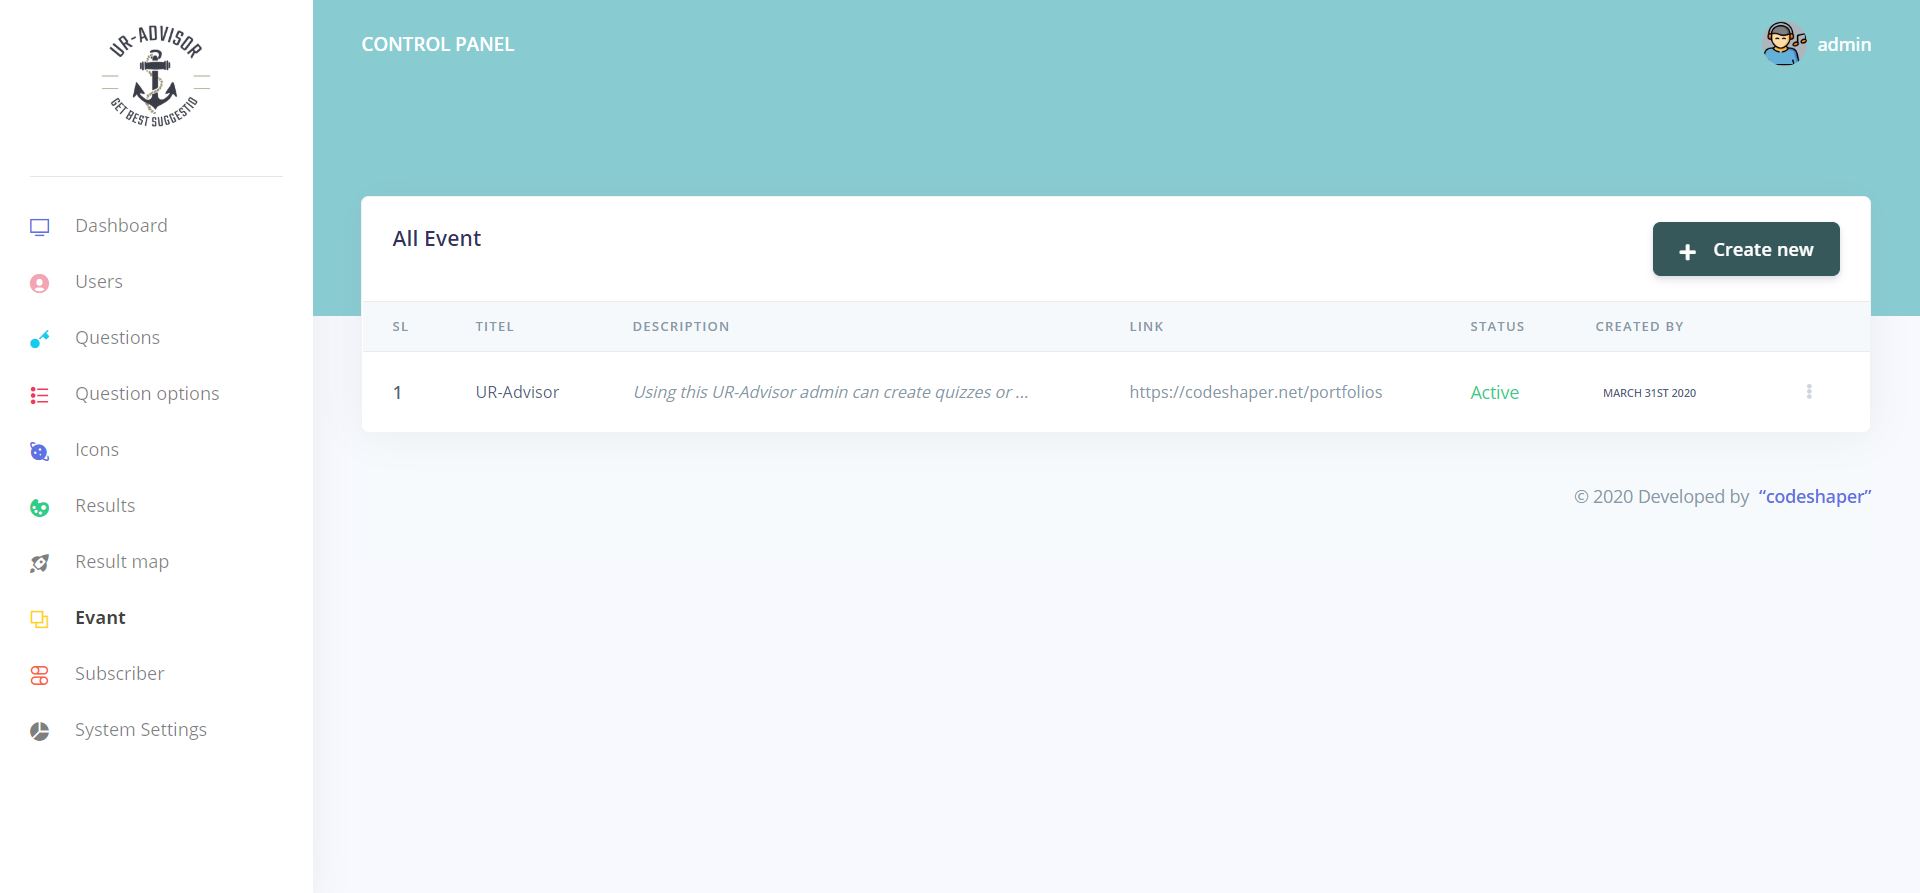
Event
This is a promotional page. From this page, you can promote your event. You can add multiple events or edit and delete events from here. After creating an event if the status is active then the event will be displayed on the final result page.
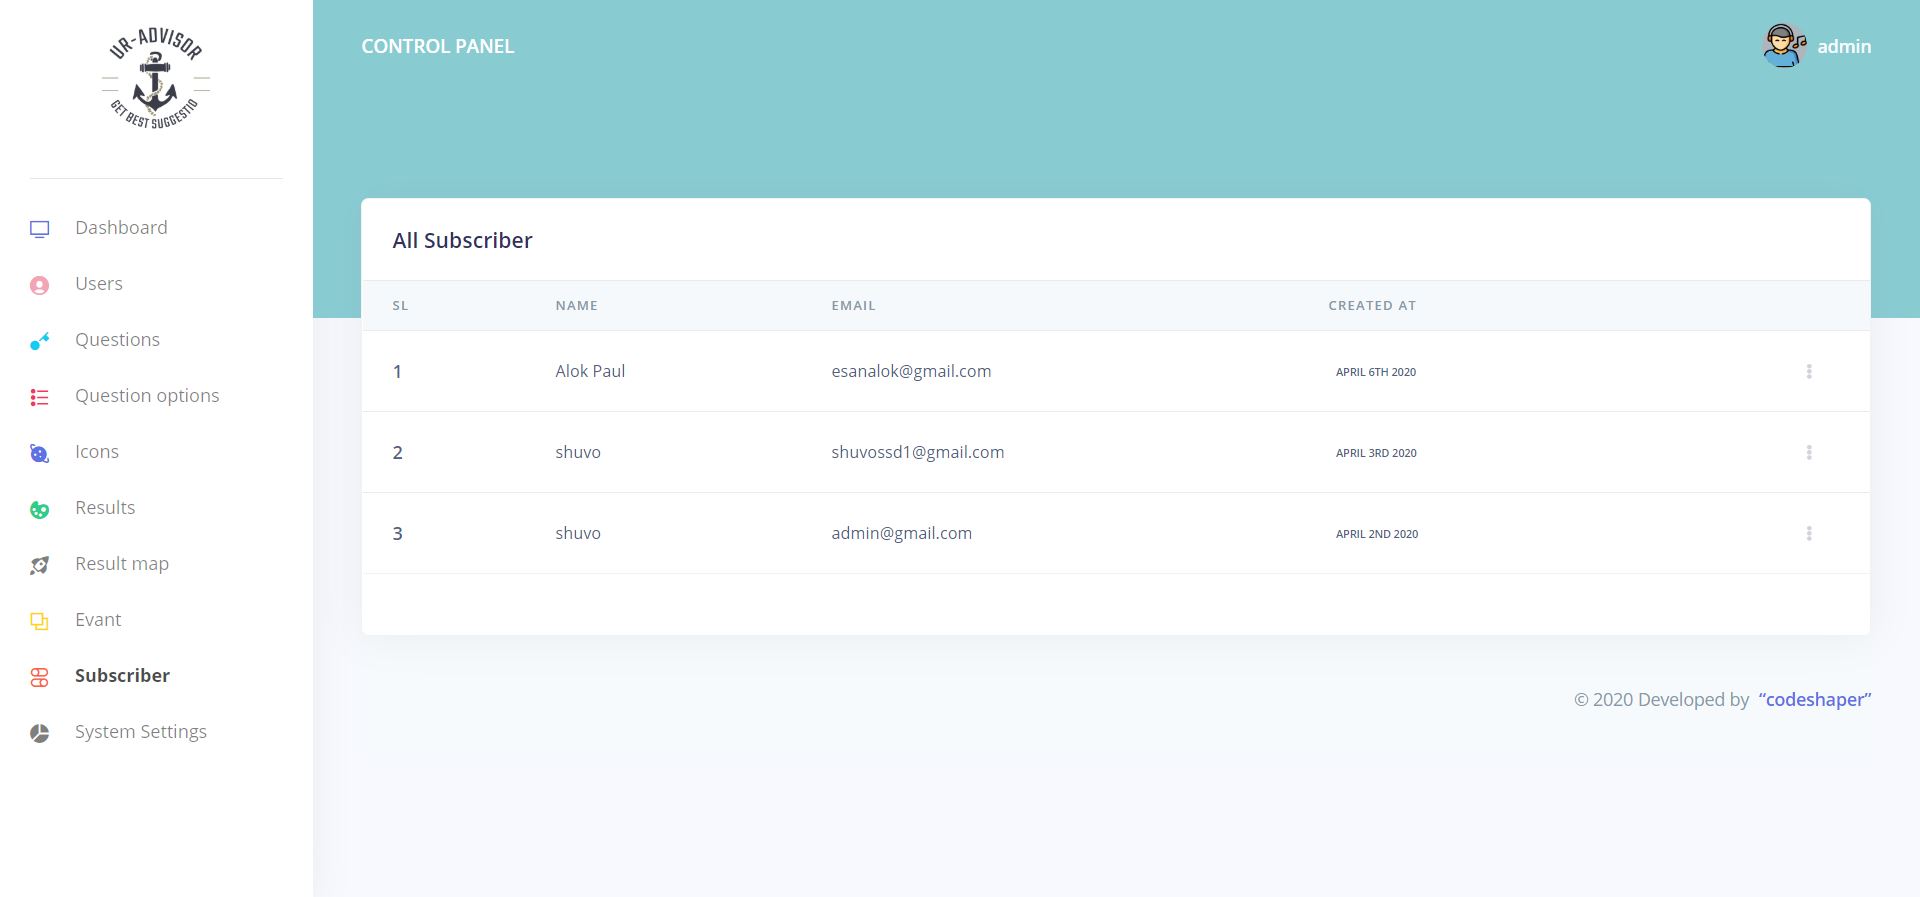
Subscriber
The subscriber page will contain all of the users' information who have participated in the survey and provided their name and email during the survey. Later you will be able to use the information for your product promotion or something else.
In our version 2.0, the admin can see the options that were chosen by a subscriber during the surevey.
System Settings
From this page, the site owner can change the system setting. For more details check the below screenshot and descriptions.
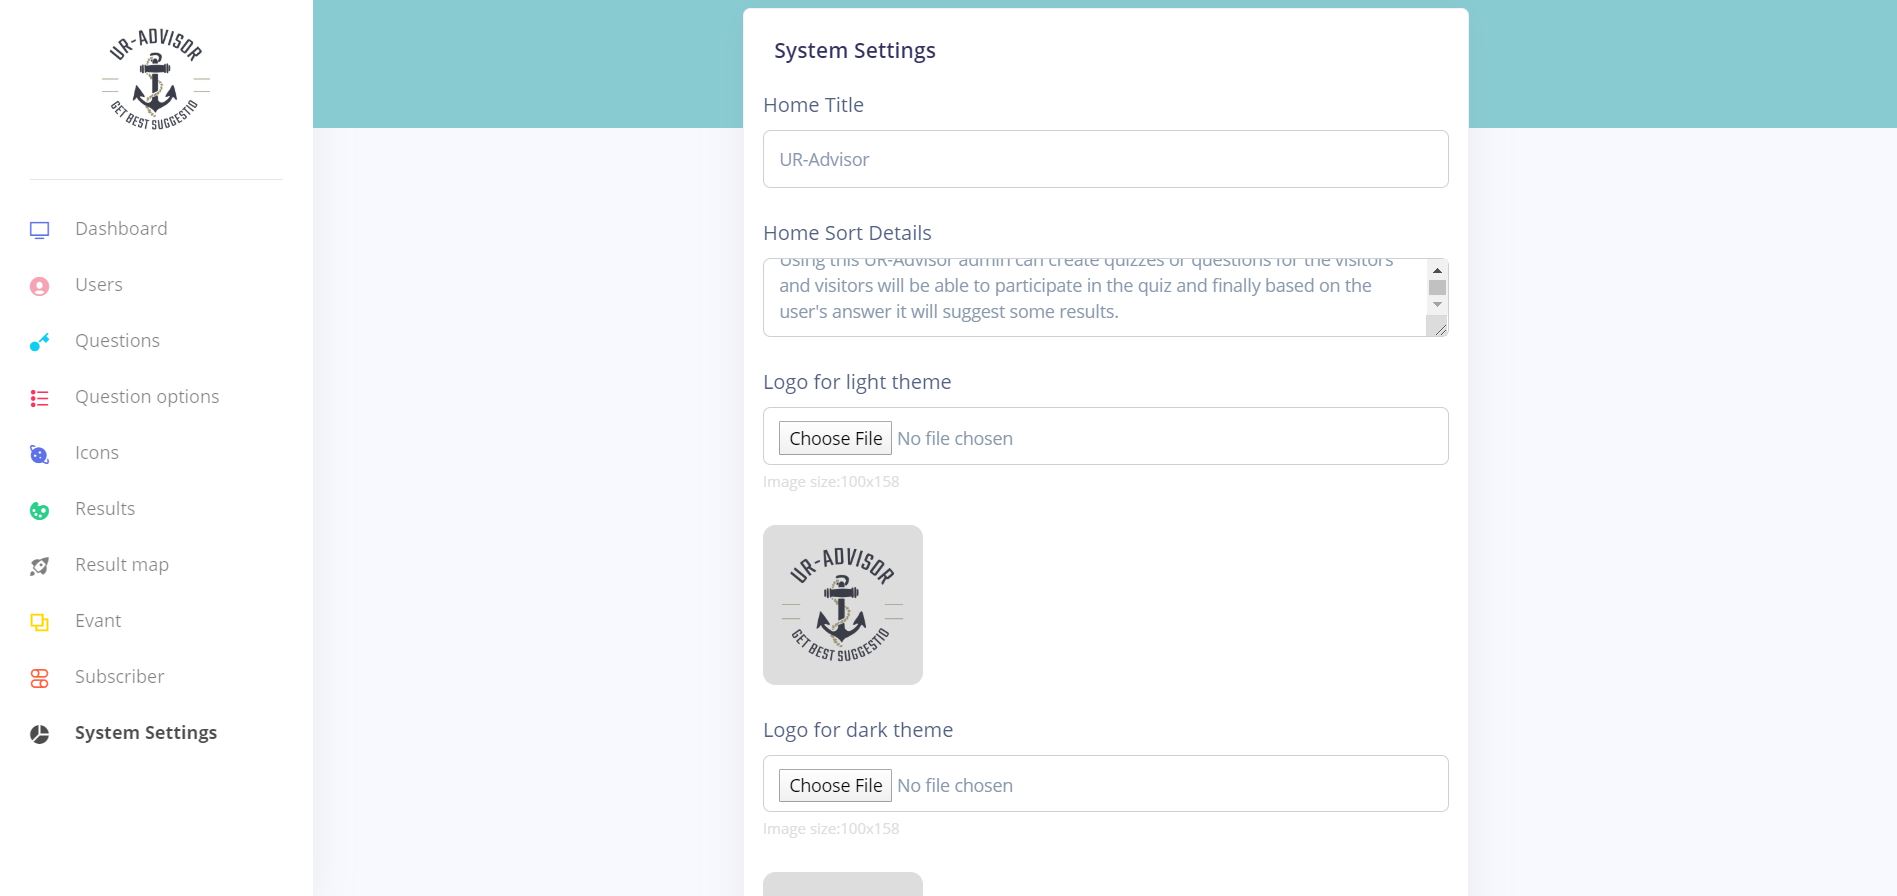
You need to enter the following information for system setup.
| Title | Enter the title of the system. Please keep it max 80 characters. It will be dispalyed in the front page |
| Short Description | Short description of the system. Please keep it max 160 characters. It will be dispalyed in the front page |
| Light Theme Logo | Logo for the light version frontend. We recommend you to use a dark png logo with size 95px X 95px |
| Dark Theme Logo | Logo for the dark version frontend. We recommend you to use a white png logo with size 95px X 95px |
| Active Theme Style | Default theme style for the frontend. You can use any of them. |
| Favicon Icon | The icon that will be dispalyed on the browser tab. We recommend you to use image size 512px X 512px |
| Site Title | The title that will be dispalyed on the browser tab. |
| Footer Text | The text that will be dispalyed in frontend footer. |
Front Page
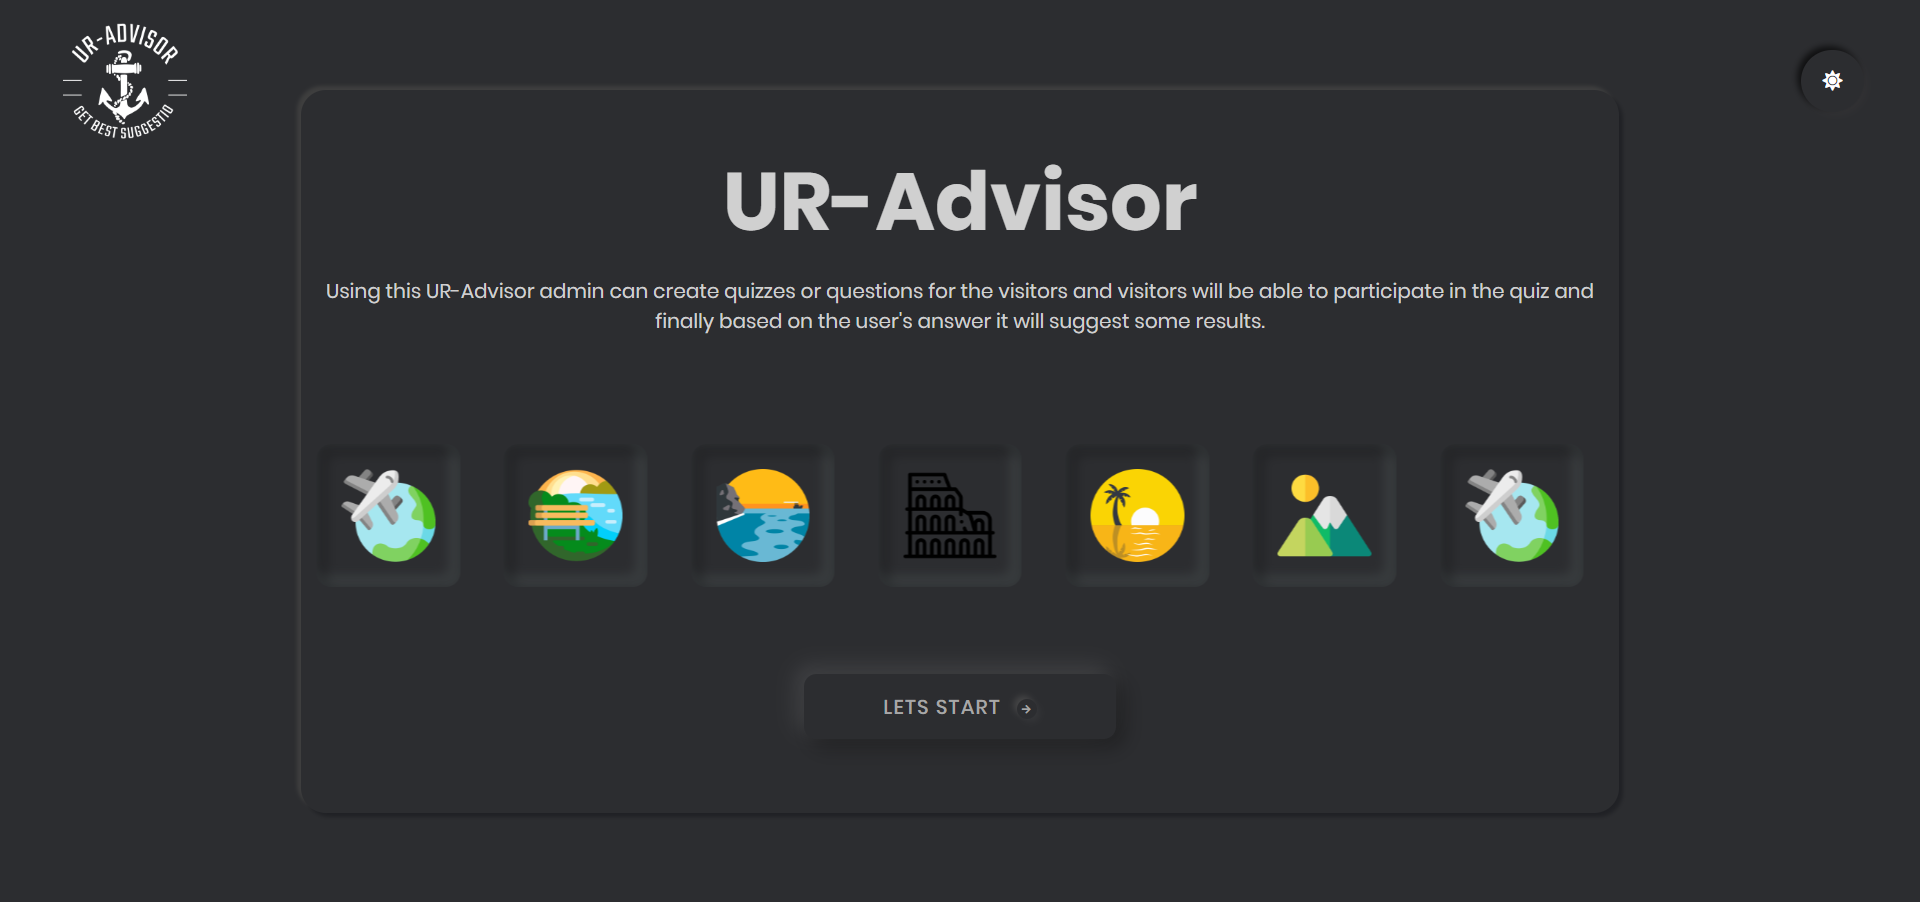
The main or the landing page of the system where the users will start the survey. On this page, you can show your logo, title, and short description. The UR-Advisor has two layouts which are dark and light. The admin has a full option to choose the default layout from the admin dashboard.
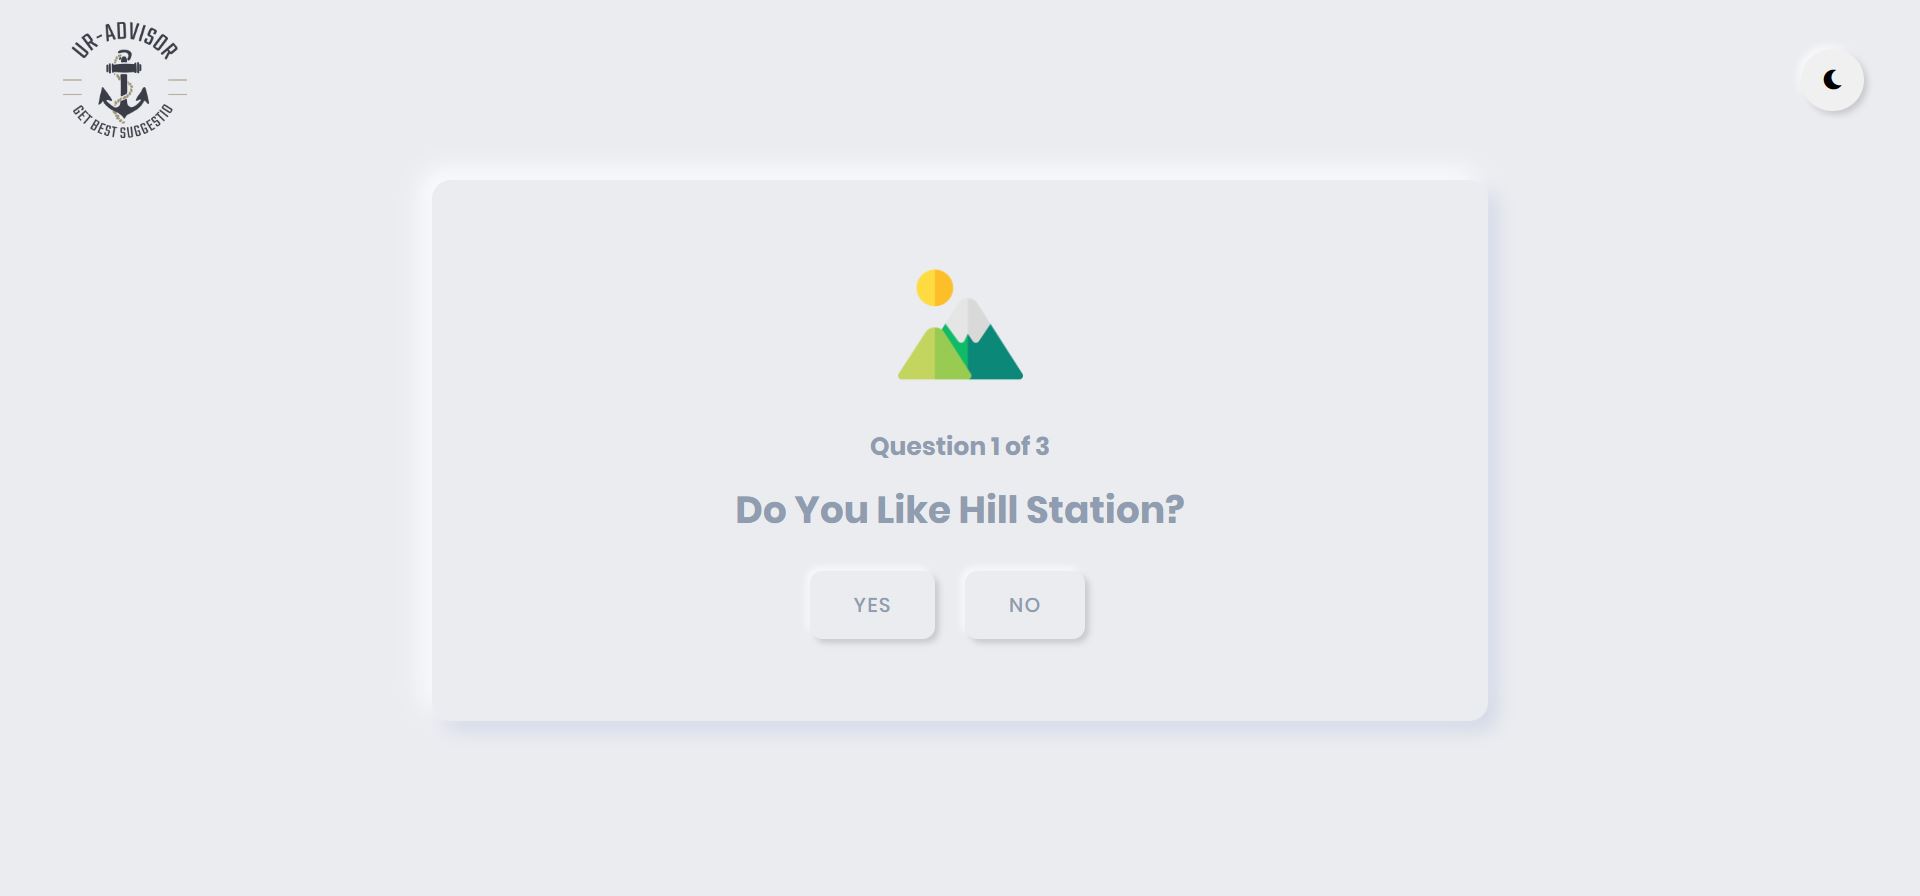
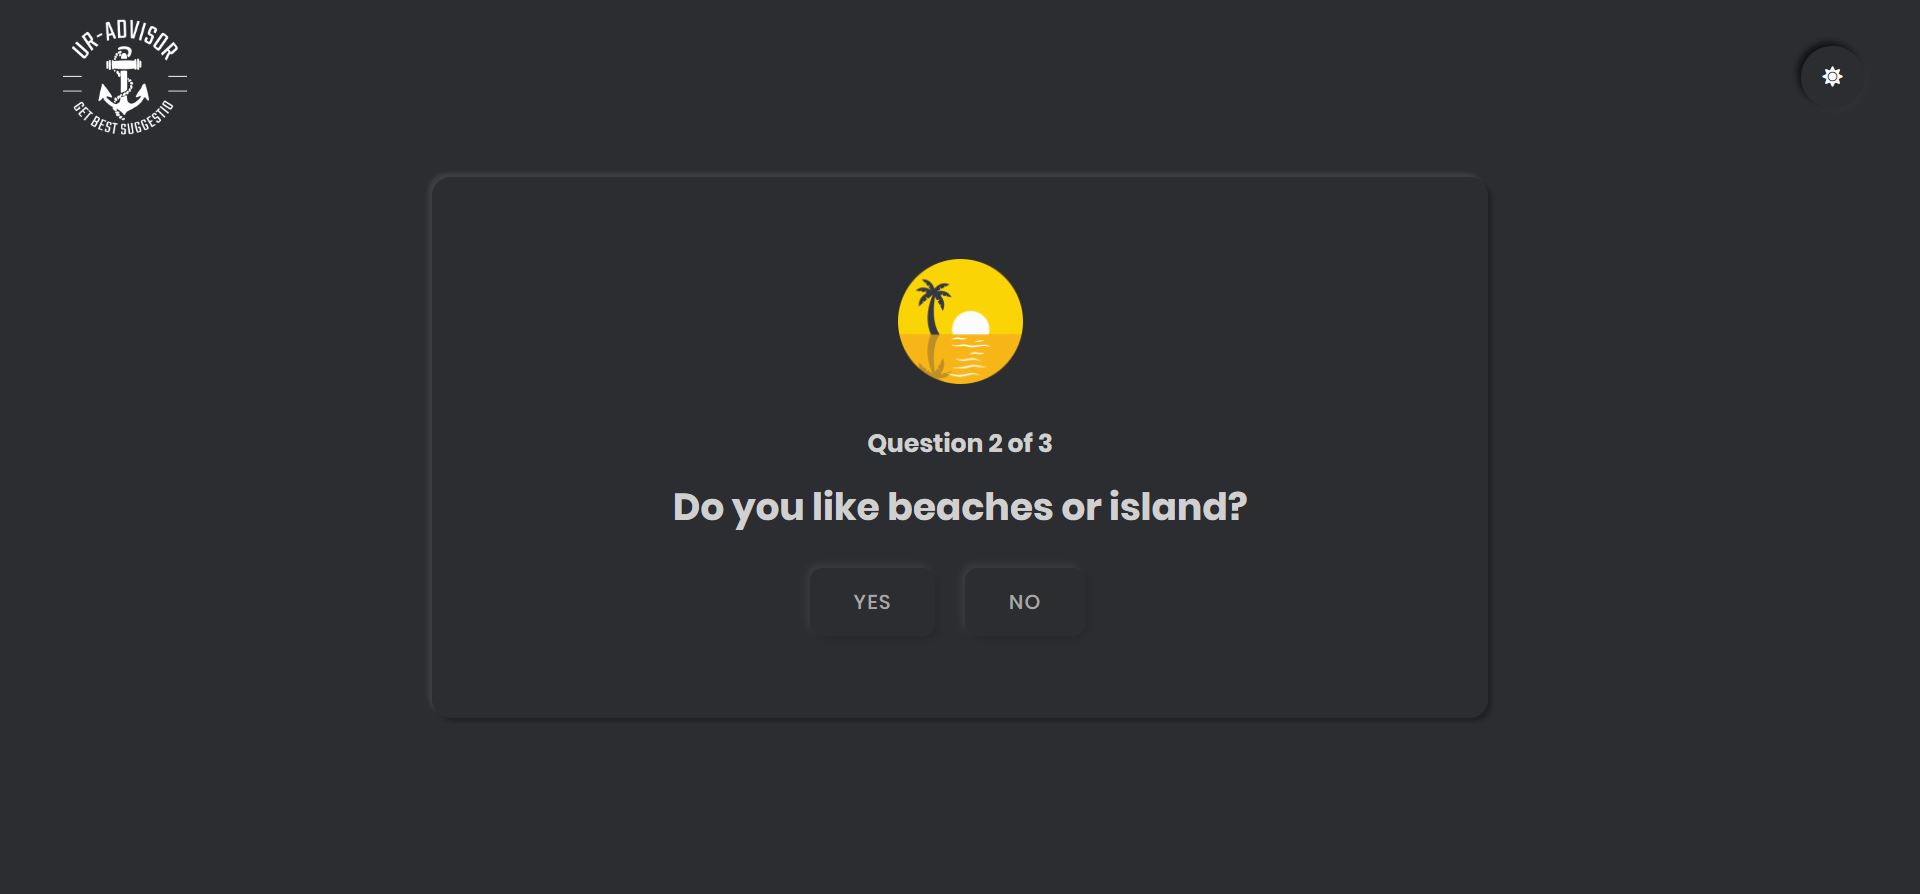
Question Page
Each question will show on an individual page. After selecting an answers the user will be redirected to the next question page.
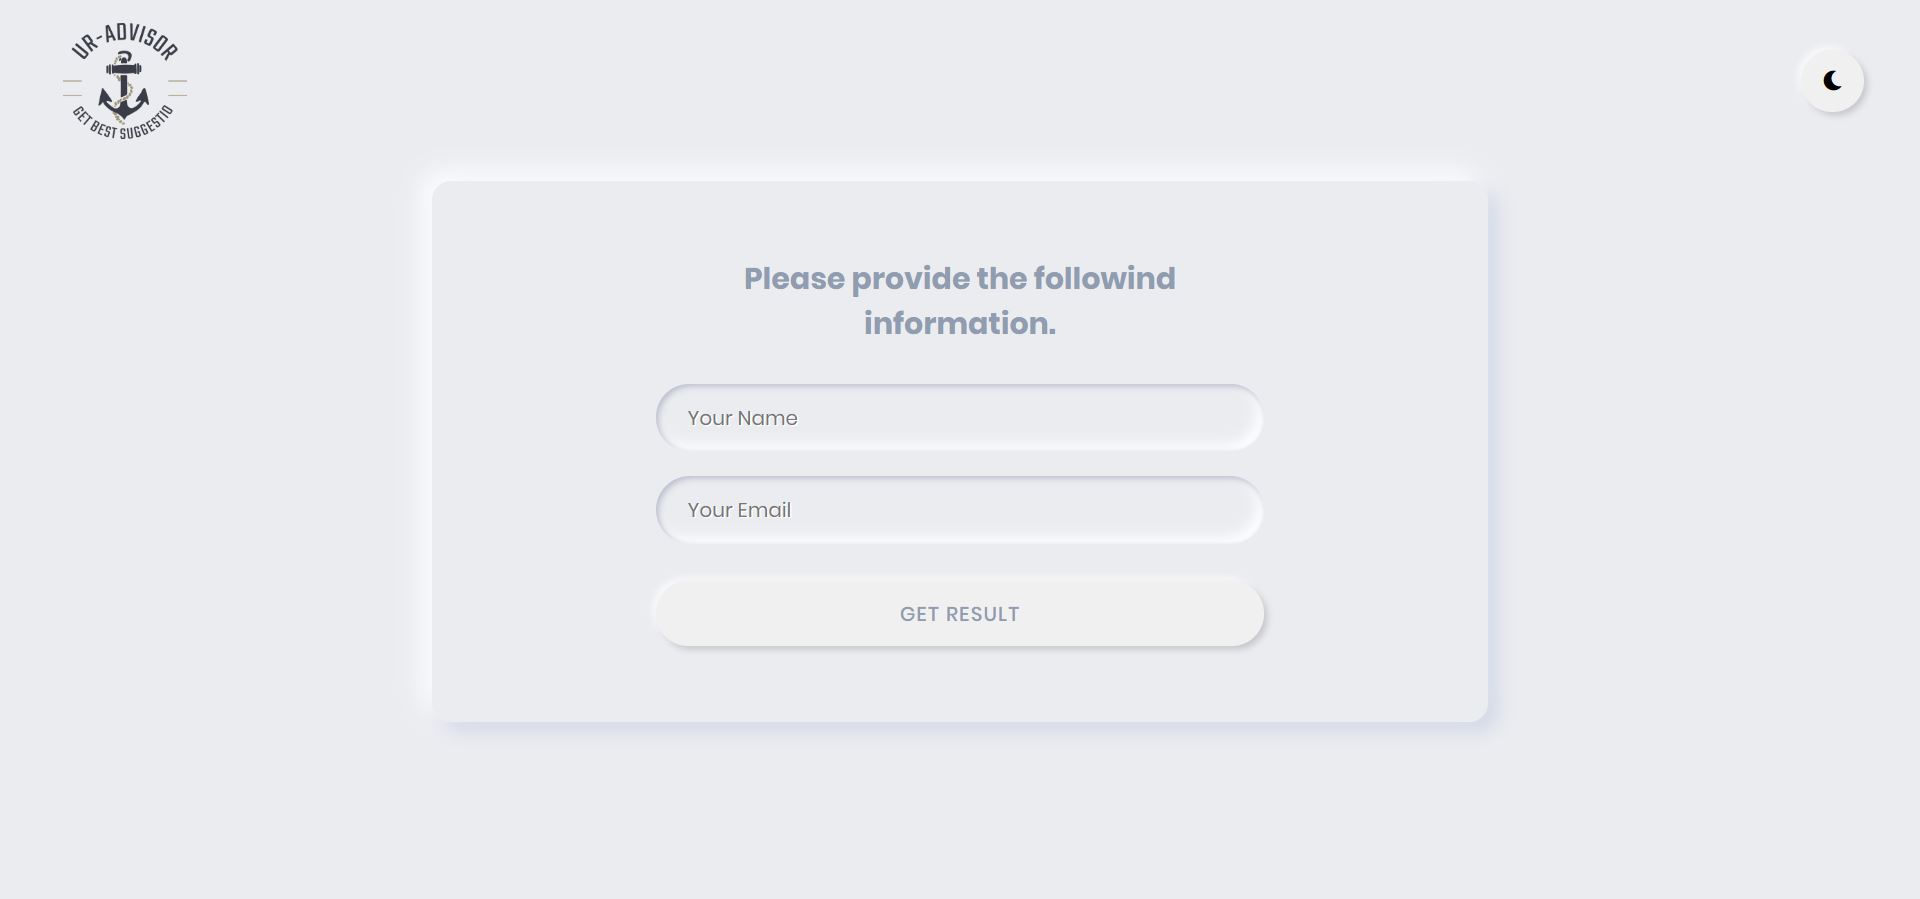
Subscriber Page
On this page, the user will be able to provide their name and email which will be stored in the database and the admin will be able to use the information for their product promotion or something else.
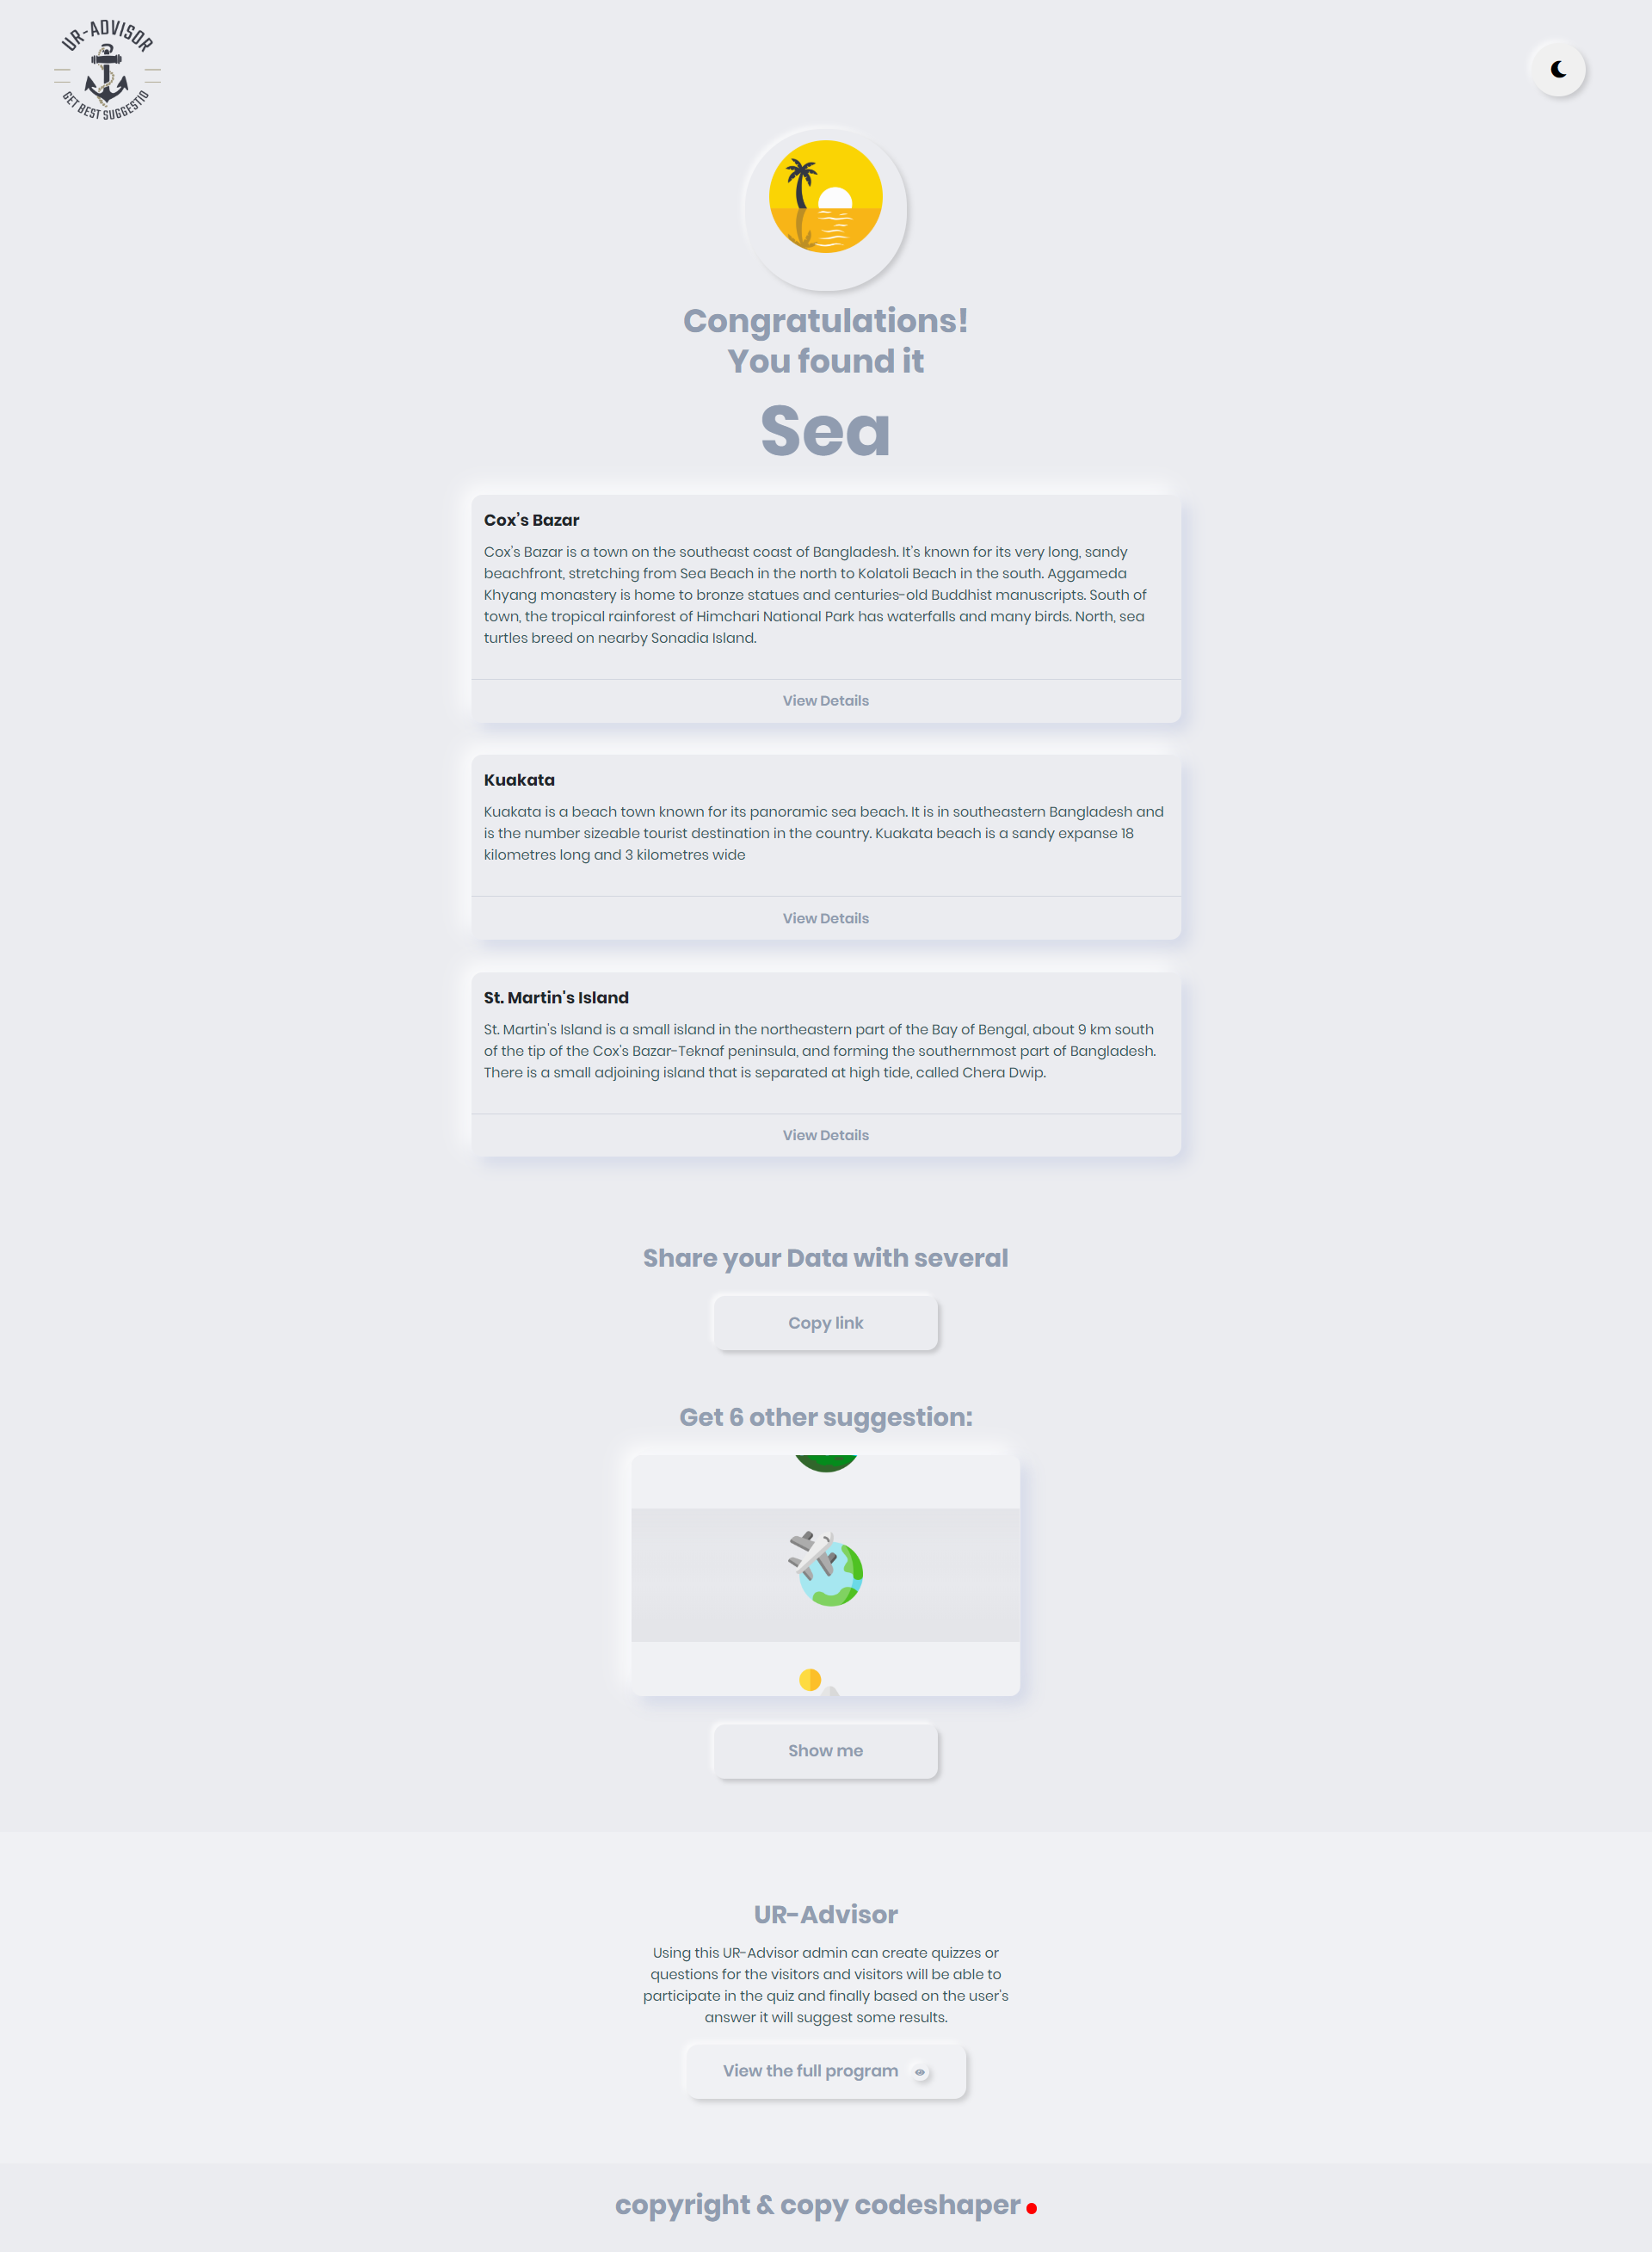
Result Page
The most important and final page of the system. After providing all the answers the users will be taken to the result page. The result page will contain the details, icons and the event.
Credits
We’ve used the following resources as listed. Special thanks to all the authors for their hard work!
| Software Framework |
|---|
| Laravel |
| VueJs |
| Bootstrap |
| Icons |
|---|
| Flaticon |
| Libraries/Scripts |
|---|
| jQuery |
| Owl Carousel |
| Admin Dashboard |
|---|
| Argon Dashboard (Free Version) |
Support
We extend our heartfelt gratitude for choosing our product. Your feedback holds immense value to us, and we kindly request you to consider leaving an inspiring review. Whether you require assistance, fixes, or have feature requests, please don't hesitate to reach out to us through our dedicated support portal. Your satisfaction remains our priority.
Note: We are available for freelance work. So if you need any kind of modification in the system then let us know will try our best to assist you.
Thank You!
Thank you so much for supporting our work by purchasing our product! We wish you all the best with your upcoming projects and endeavours in life! If you would like to check out more of our products, be sure to visit our website.
Have a great day and happy coding!